
How to Transcribe Instagram Reels (2 Simple Methods That Work)

Quick Summary
This guide shows you how to transcribe Instagram Reels using two methods: a manual approach and a faster AI-powered workflow with WhisperTranscribe. You’ll learn the exact steps for both, the limits of doing it by hand, and best practices to improve accuracy, readability, and content reuse. Visit the WhisperTranscribe blog for more practical guides.
Struggling to Turn Your Instagram Reels Into Text You Can Use?
Instagram Reels are packed with useful ideas, but most of that value stays locked in video. If you want to reuse that content, you first need to turn it into text. That’s where transcription comes in.
In this WhisperTranscribe guide, you’ll learn how to transcribe Instagram Reels using two simple methods. First, you can use a manual approach for free. Then, a faster and better option that helps you save time and scale your workflow.
But first…
Why Listen to Us?
At WhisperTranscribe, we help creators and teams turn video and audio into accurate, usable text every day. We understand the challenges of transcribing short-form content like Instagram Reels. This guide is based on that experience, so you can transcribe faster and get more value from your content.
Why Transcribe Instagram Reels?
Transcription is the process of converting spoken audio into written text. For Instagram Reels, this can mean creating full transcripts, captions, or subtitles you can reuse across different platforms. Instead of replaying a video multiple times, you get everything in a format that’s easy to read, edit, and share.
Transcribing Instagram Reels makes your content more useful and easier to work with.
Repurpose content: Turn short videos into blog posts, emails, or social media captions without starting from scratch.
Accessibility: Many users watch Reels without sound, so text helps them follow along.
Better engagement: Captions keep viewers watching longer and improve retention.
Search and rrganization: Written text makes it easier to find key ideas later.
Scale content output: Helps creators and marketers produce more content from one video.
Next, let’s look at how to transcribe Instagram reels using two different methods.
Step-by-Step Guide to Transcribing Instagram Reels (Manual & AI Methods)
Method 1: How to Transcribe Instagram Reels Manually
If you only need to transcribe one Reel, doing it manually can work. You don’t need special software, and you can start right away.
Step 1: Open the Instagram Reel and Set Yourself Up
Start by opening the Instagram Reel you want to transcribe on your device. Before you begin, make sure your setup won’t slow you down. Ideally, you should use headphones for clearer audio and work at a desk where you can focus.
Most importantly, use a desktop or laptop if you can. Typing on your phone while pausing and replaying a Reel gets frustrating fast. A bigger screen and a proper keyboard make the process much easier.
Step 2: Turn On Captions If Available on the Reel
Some Instagram Reels may include auto-generated captions, depending on the creator, device, and region. If they are available, you can turn them on and use them as a light reference, not a reliable transcript.
Here’s how to turn them on:
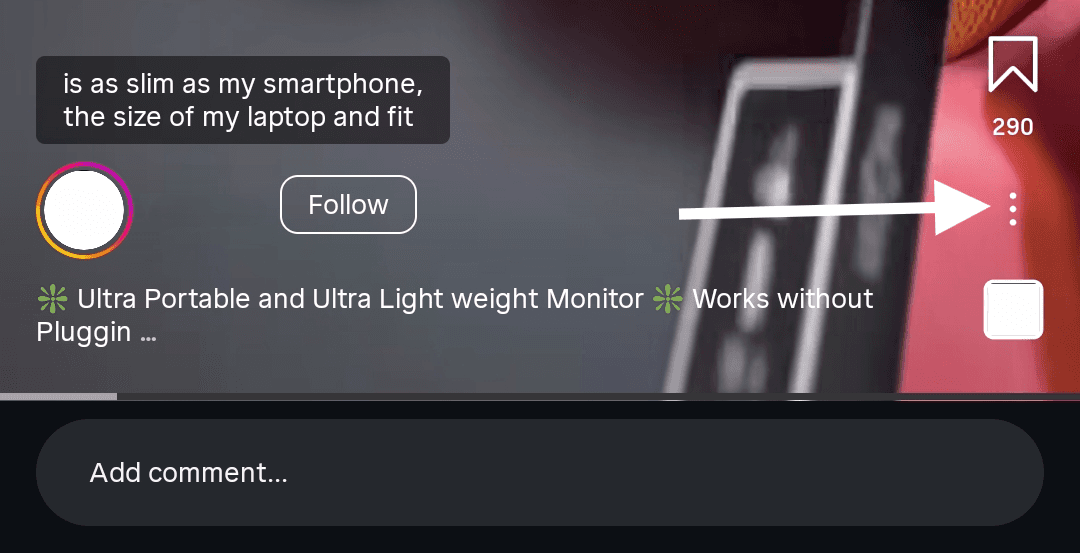
Play the Reel and tap the three-dot icon on the lower-left side of the screen.
Then tap “Closed Captions” and select “Always Show Closed Captions” (if available on your device).
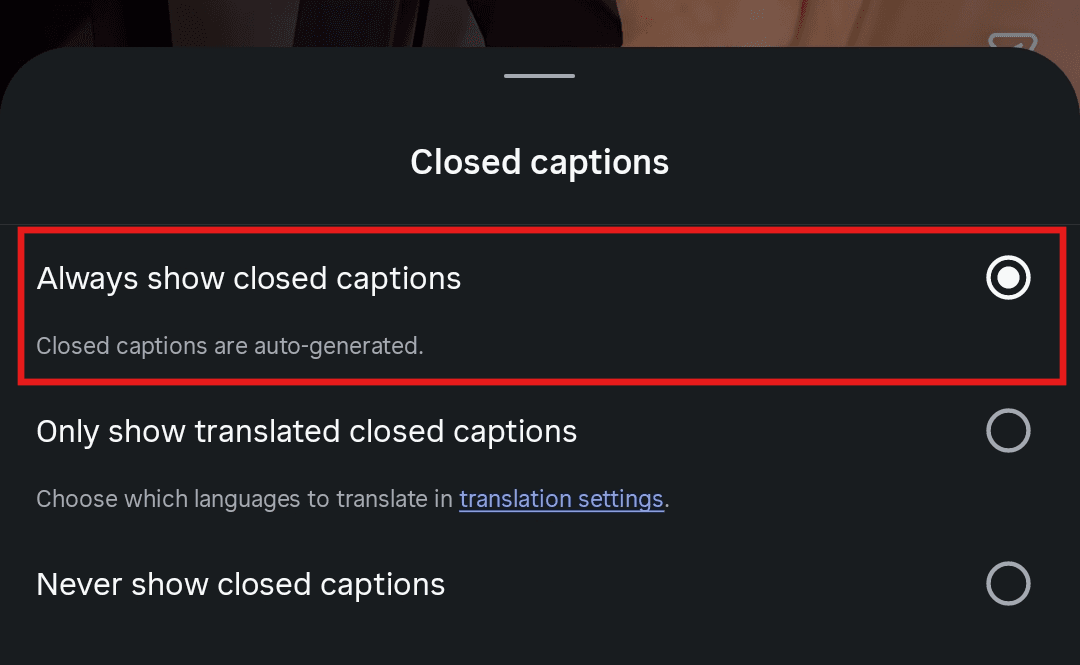
If the Reel is in another language, you can also choose “Only Show Translated Closed Captions” to view translated text instead.
That said, captions aren’t always reliable. They often struggle with accents, background music, industry terms, and words spoken close together. Also, this option is only available in the Instagram mobile app.
Step 3: Listen to the Reel First
Before you start typing anything, play the Reel from start to finish at least once. Focus on understanding the overall message, tone, and flow.
Pay attention to:
How fast the speaker talks
Any accents or slang used
Background music or overlapping audio
Key phrases or repeated ideas
This first pass helps you build context. You’ll find it much easier to transcribe once you already know what’s coming next.
Step 4: Transcribe the Reel in Short Sections
Now that you understand the content, go back to the beginning and start transcribing. Open a note-taking app or document and start typing the transcript line by line. Play the Reel and pause every few seconds to write down what you hear.
Work in short sections. This helps you stay accurate, especially when the speaker talks quickly or the audio isn’t clear.
For example, if a creator says, “Here’s how I grew my page in 30 days,” write that down exactly before worrying about formatting.
You’ll likely replay certain parts multiple times. That’s normal. Focus on capturing the words as clearly as possible. Don’t aim for perfection yet. The goal here is to get a complete first draft.
Step 5: Review, Clean Up, and Format the Transcript
Once you finish the first pass, go back through the Reel and compare it against your draft. Fix punctuation, correct any missed words, and break long blocks of text into something easier to read.
At this stage, think about how you plan to use the transcript. If it’s for captions, shorter lines work better. If it’s for a blog post or content repurposing, you may want full sentences and a cleaner structure. This step takes time, but it’s what turns a rough draft into something usable.
Limitations of Transcribing Instagram Reels Manually
Manual transcription can work for the occasional Reel, but it becomes hard to sustain if you do it often. Here are the limitations that may draw you back:
Takes more time than expected: Even a short Reel can take much longer to transcribe once you add replaying, typing, correcting, and formatting.
Accuracy can still be an issue: Reels often include fast speech, background music, slang, sound effects, or overlapping audio. Even with captions turned on, you’ll still need to double-check what was said.
Becomes tiring: Manual transcription requires constant focus. You have to pause, replay, listen closely, and type at the same time, which gets exhausting fast.
Doesn’t scale well: If you’re transcribing Reels regularly, this method quickly becomes a bottleneck. What works for one video becomes difficult to manage across several.
Slows down content repurposing: The longer the transcription takes, the longer it takes to turn that Reel into captions, blog content, summaries, or social posts.
If you only need to transcribe one Reel once in a while, the manual method may be enough. But if you want a faster and more reliable workflow, it makes more sense to use a transcription tool like WhisperTranscribe.
Method 2: How to Transcribe Instagram Reels Using WhisperTranscribe (Fast and Scalable)
WhisperTranscribe removes the bottlenecks of manual Instagram Reel transcription by automating the transcription process, improving accuracy, and giving you tools to edit, export, translate, and repurpose your content in one place.
Instead of spending time replaying short clips and typing everything by hand, we help you move from Reel to transcript much faster. Let’s see how it works.
Step 1: Download and Install WhisperTranscribe
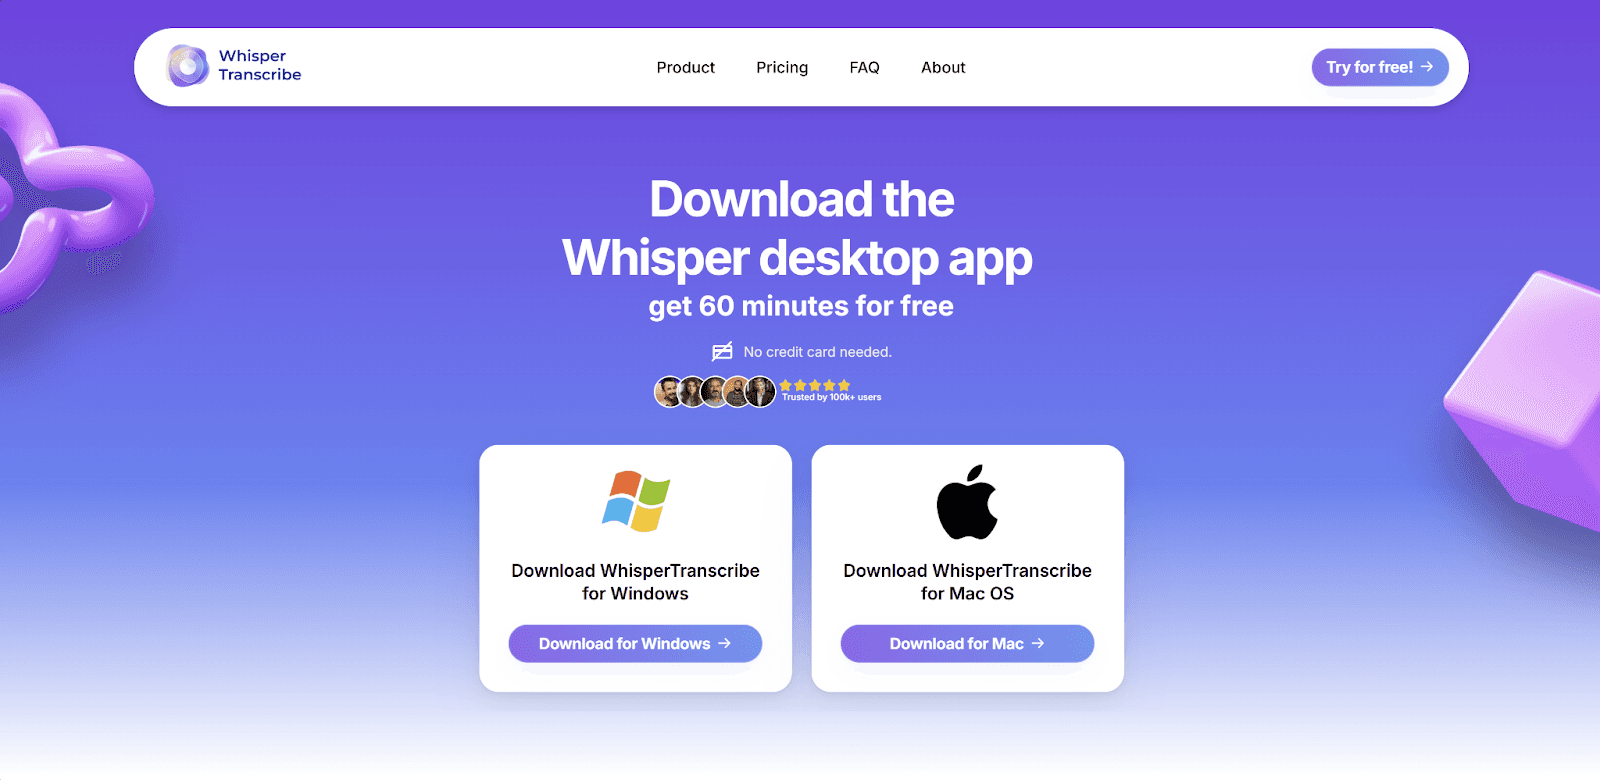
The first step is to install WhisperTranscribe on your computer. To do that, visit our website. On the homepage, click “Try for Free” to open the download page. Then choose the version that matches your computer, whether you use Mac or Windows.
Once the download is complete, follow the prompts on your screen to install the app. After that, open WhisperTranscribe and create your account to get started. You’ll be signed in automatically after signing up. Then you can move to the next step and upload your Instagram Reel for transcription.
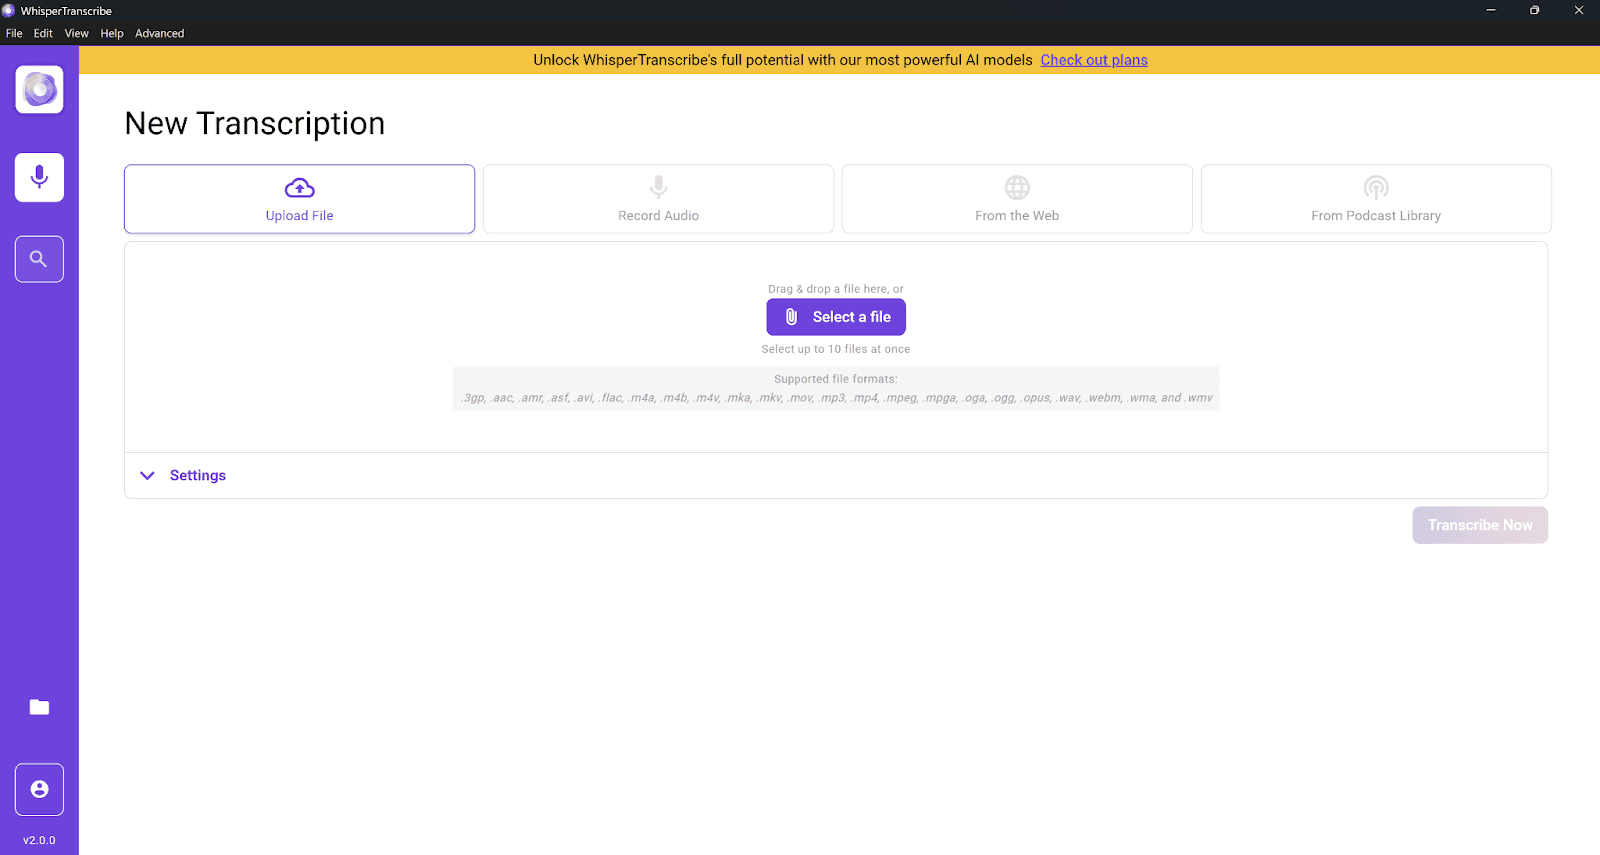
Step 2: Upload or Import the Instagram Reel
The next step is to get your Reel into WhisperTranscribe. You can do this in two ways:
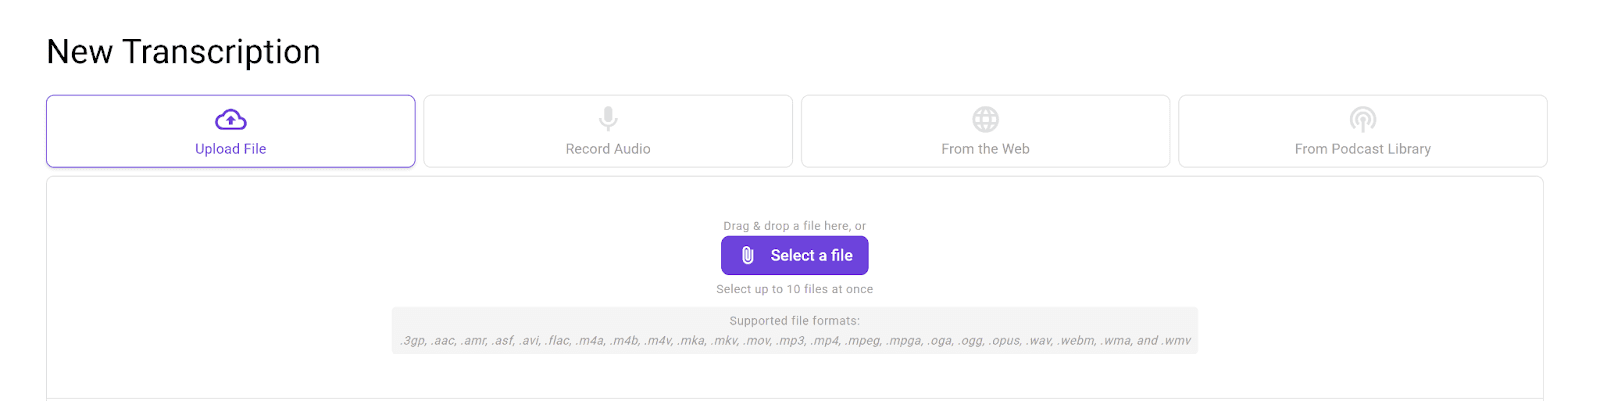
Direct Upload: If you’ve already saved the Reel to your device, simply upload the video file from your computer using the “Upload File” option.
Import from Instagram: You can copy the link to the Instagram Reel you want to transcribe and paste it directly into WhisperTranscribe using the “From the Web” option.
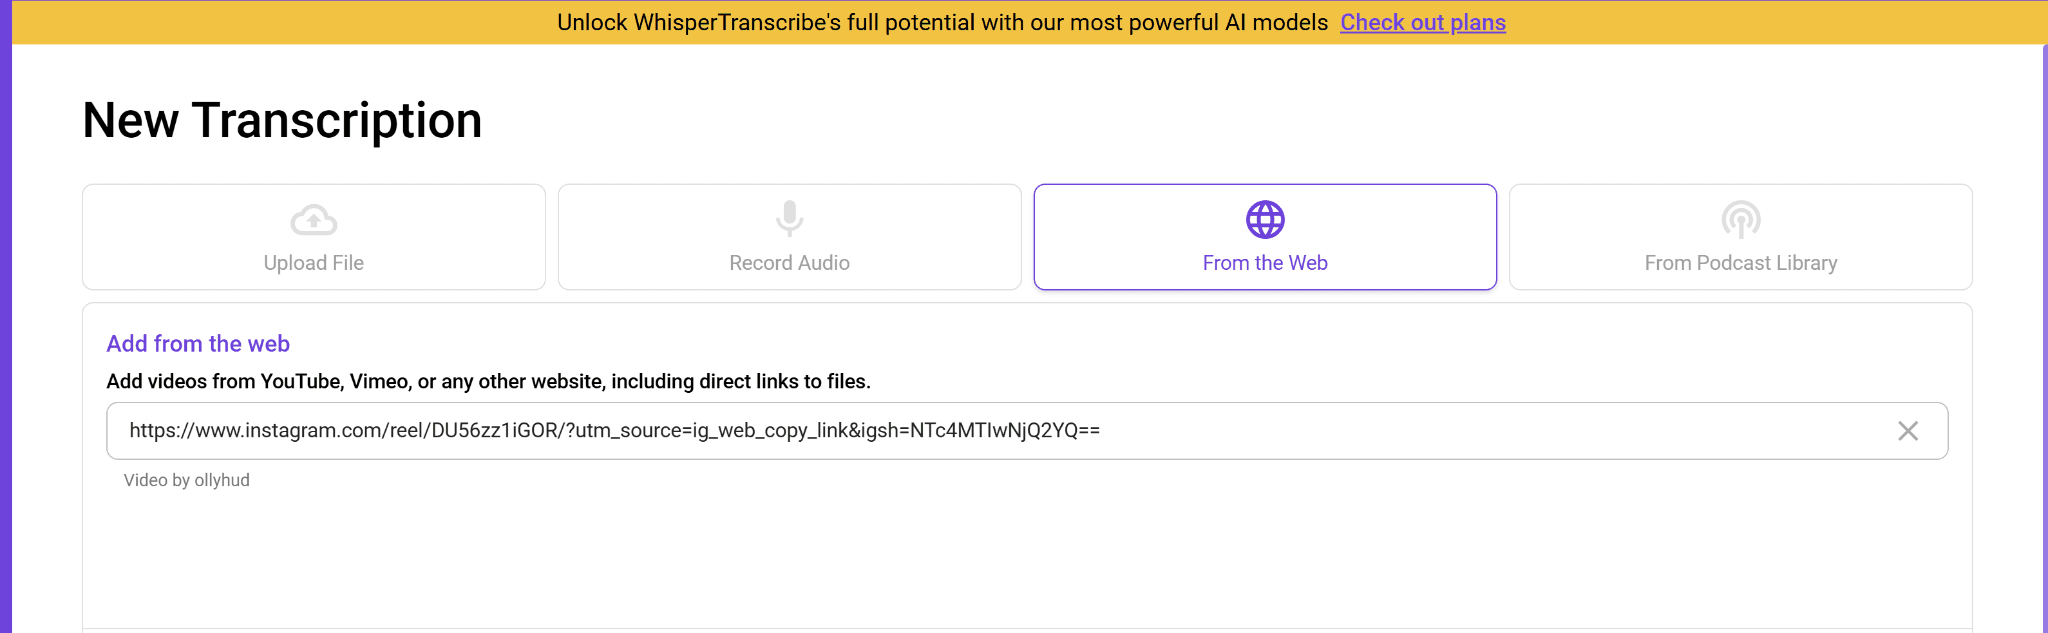
Uploading Instagram Reels to WhisperTranscribe takes only a few seconds, whether you’re uploading from your computer or Instagram directly.
NOTE: For this guide, we’re importing via link.
Step 3: Configure Your Transcription Settings
Once the file is uploaded, you’re ready to choose your transcription settings and let WhisperTranscribe process the Reel. This is the step where you:
Set a name for your Instagram Reel’s transcription.
Choose where you want to save the final transcript on your device. For instance, you can save it in the projects folder.
Select the primary language spoken in the Reel. You can choose from 55+ languages.
Toggle multiple languages on/off depending on whether the Reel has multiple spoken languages. Our tool can detect up to 5 languages in a single Instagram Reel.
Enable speaker recognition to distinguish among multiple speakers. This is important if there is more than one speaker in the Reel.
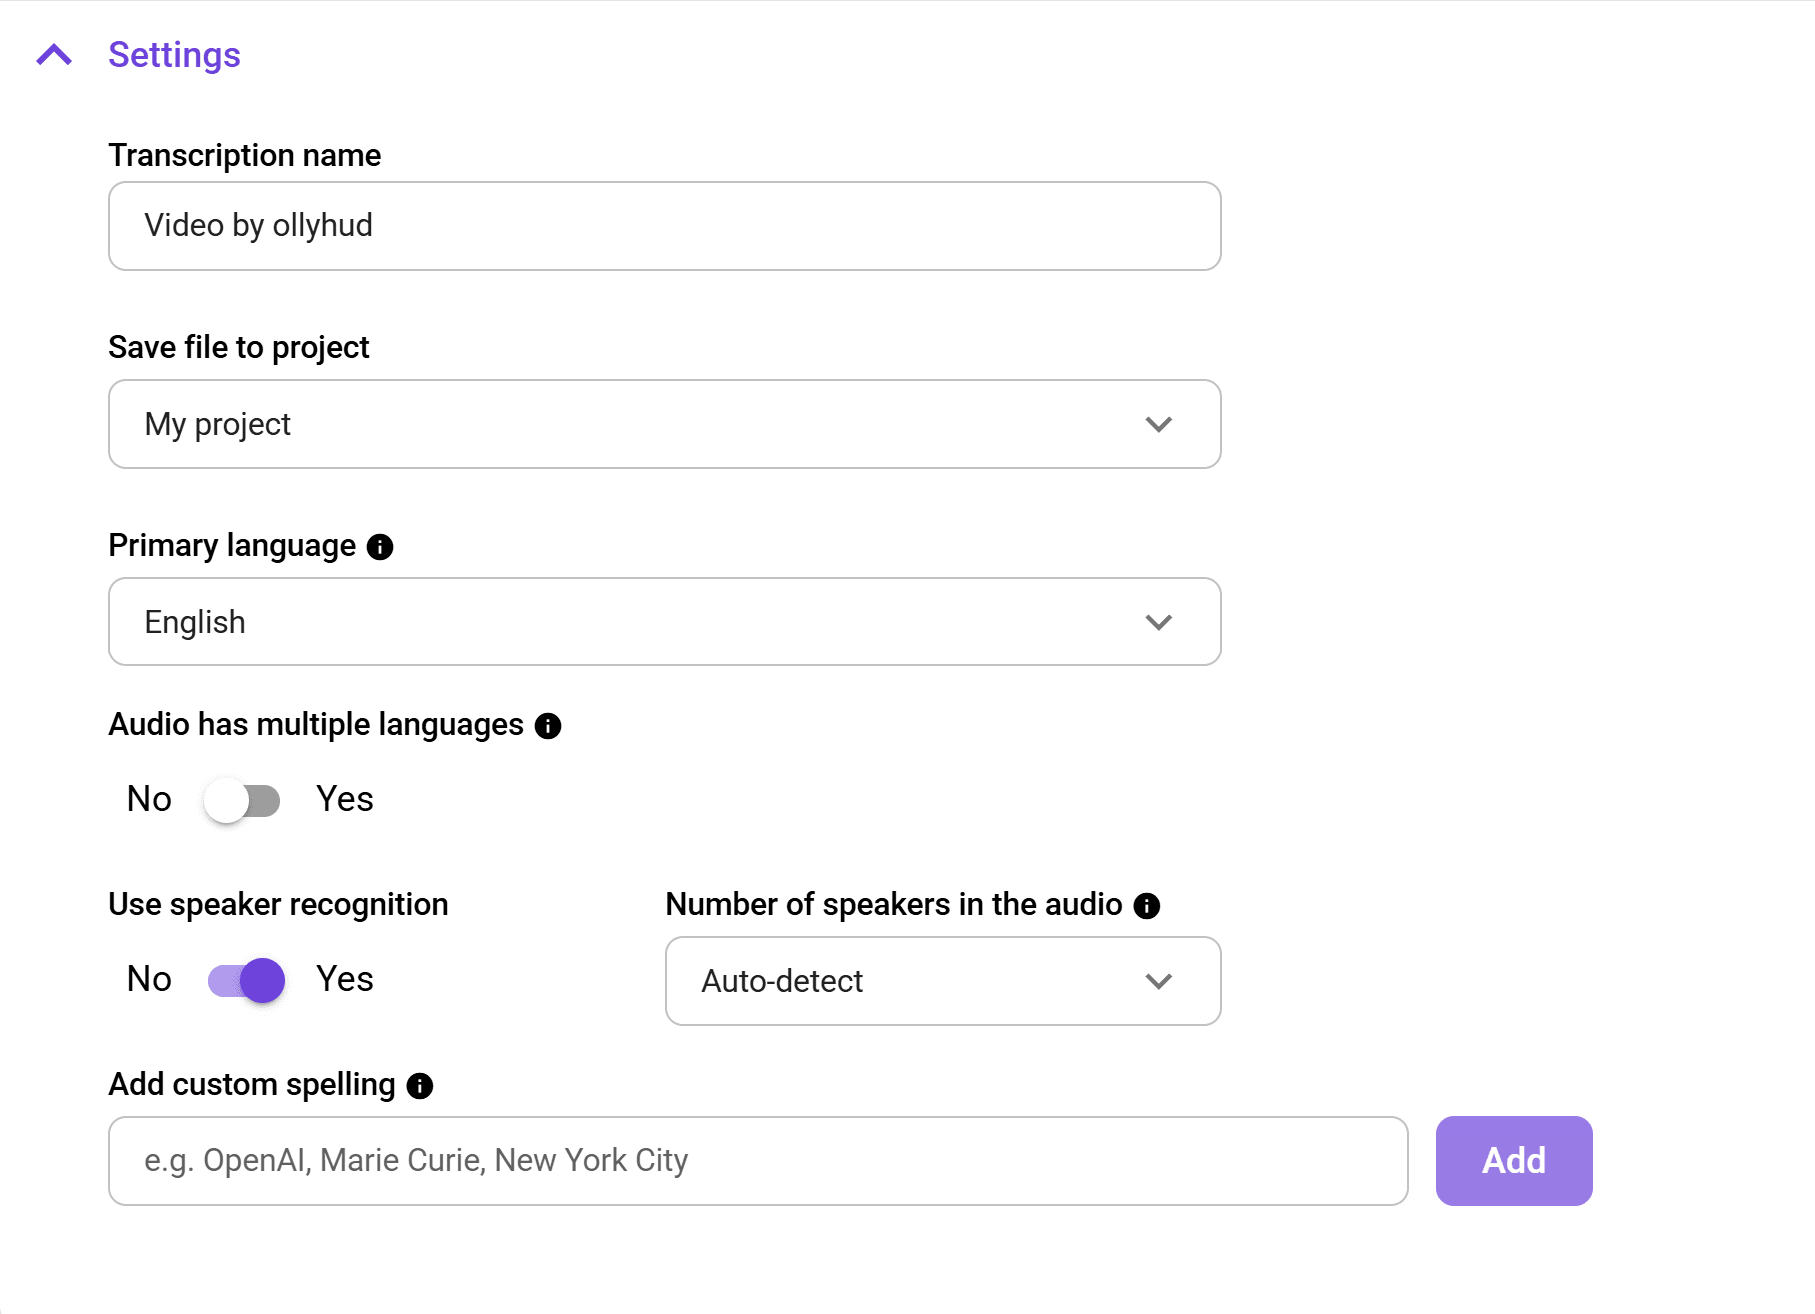
This setup takes only a few seconds to a minute. However, doing it properly ensures maximum accuracy in your final transcript.
Step 4: Start the AI Transcription
Once your settings are in place, click “Transcribe Now” and let WhisperTranscribe do the heavy lifting. Our AI transcription engine automatically processes your Instagram Reel and converts spoken audio into text with strong accuracy for most clear audio.
Whether your Reel includes fast speech, background noise, or different accents, WhisperTranscribe can still produce a reliable transcript in just a few seconds to a few minutes.
This is where the workflow becomes much easier than doing it manually. Instead of replaying short clips and typing line by line, you can relax while our tool generates the first draft for you and move on to reviewing the final transcript.
Step 5: Review and Edit
Once the transcript is ready, it opens automatically in our built-in editor, as shown below. You can review everything in one place while listening to the audio.
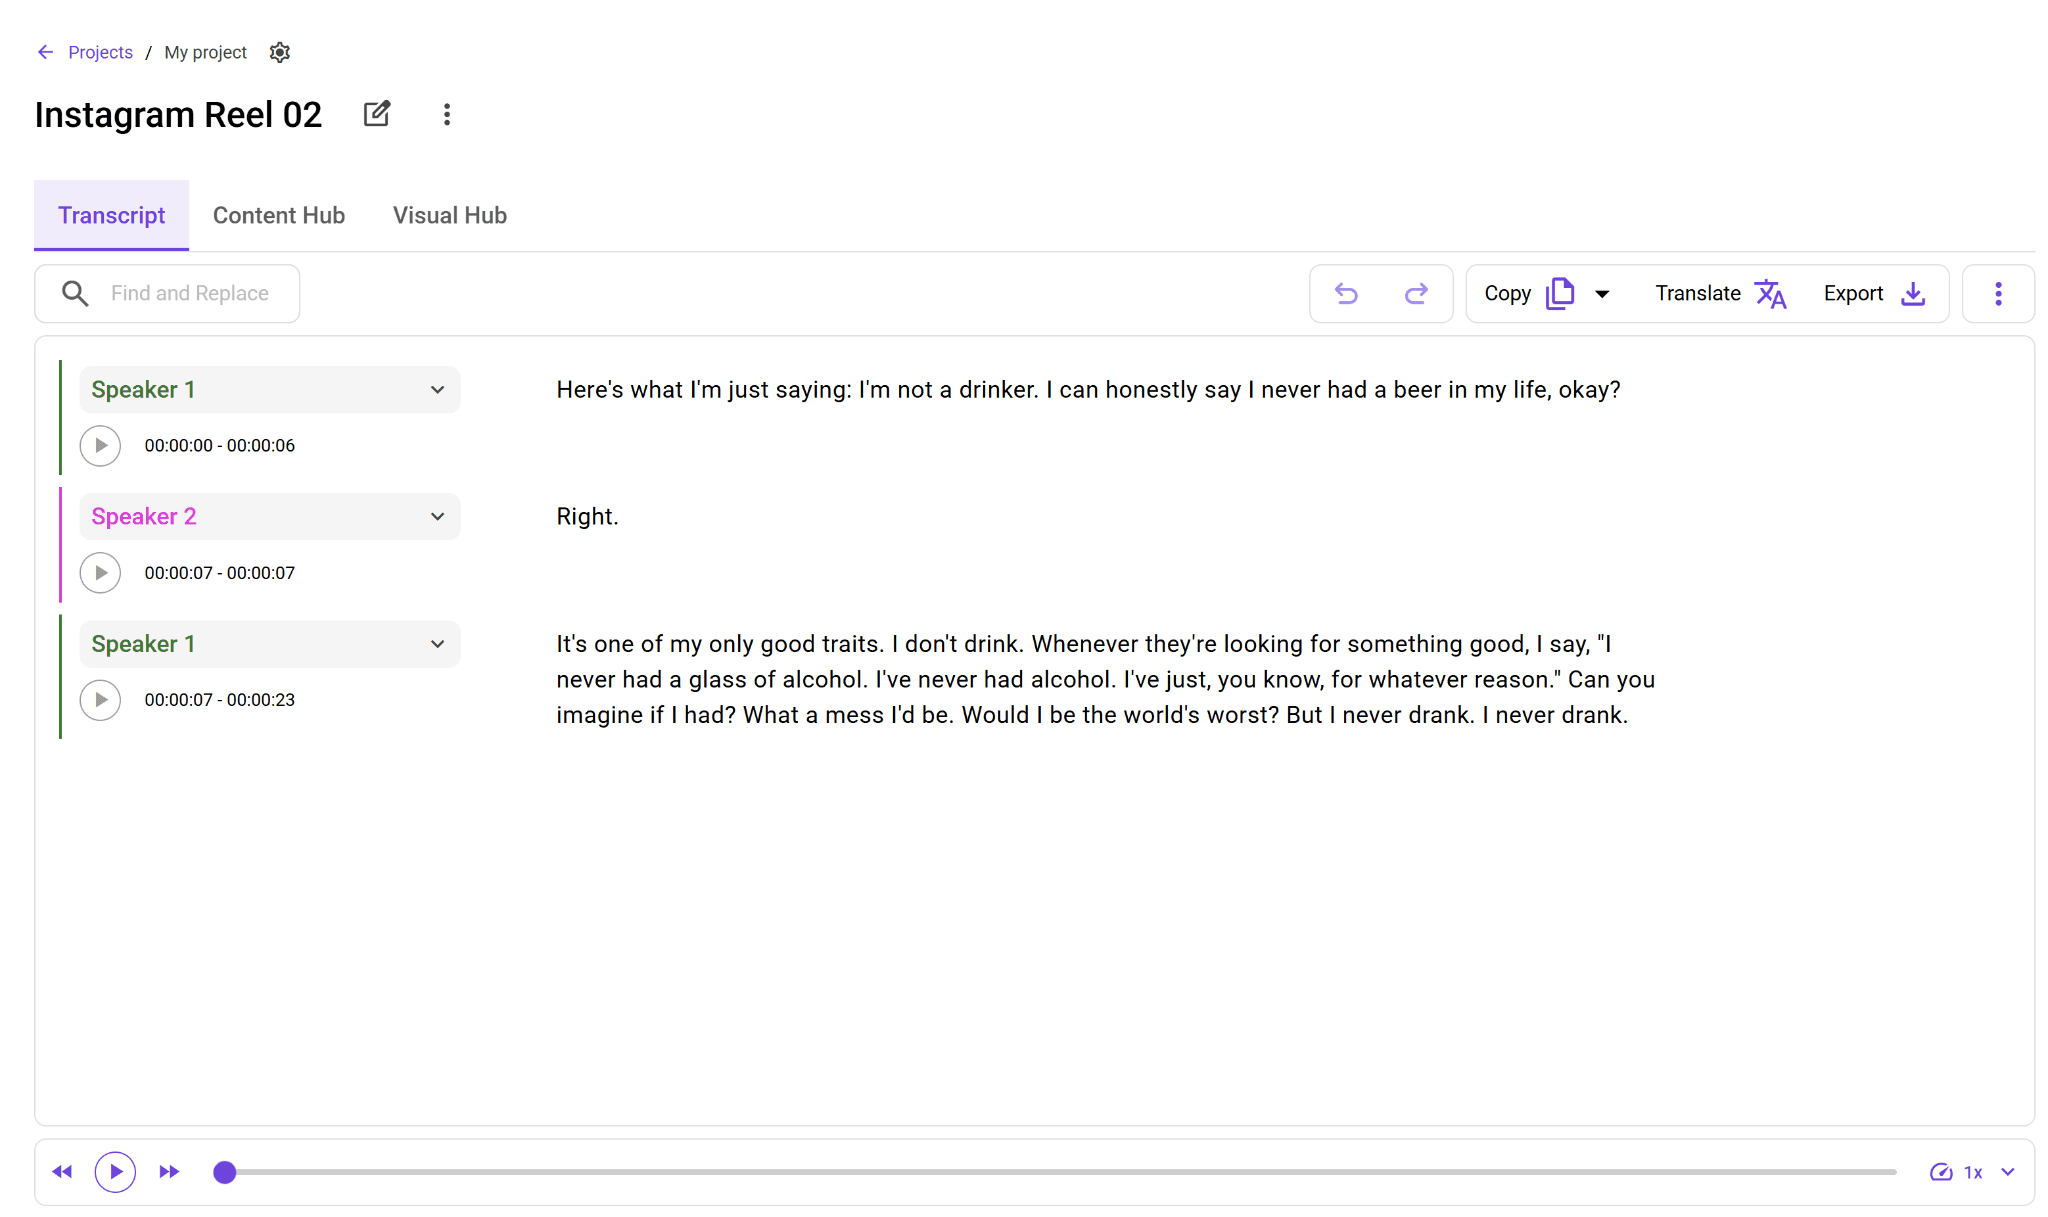
If needed, you can fix minor errors, adjust wording for clarity, and even highlight important sections. This step is much faster than manual transcription because you’re only refining, not starting from scratch.
Step 6: Export and Repurpose Your Transcript
This is where WhisperTranscribe stands out. You don’t just get a transcript from your Instagram Reel, you can turn it into usable content right away.
You can translate your transcript into 99+ other languages without losing the timing. Just click the “Translate” button and pick your preferred language from the options available.

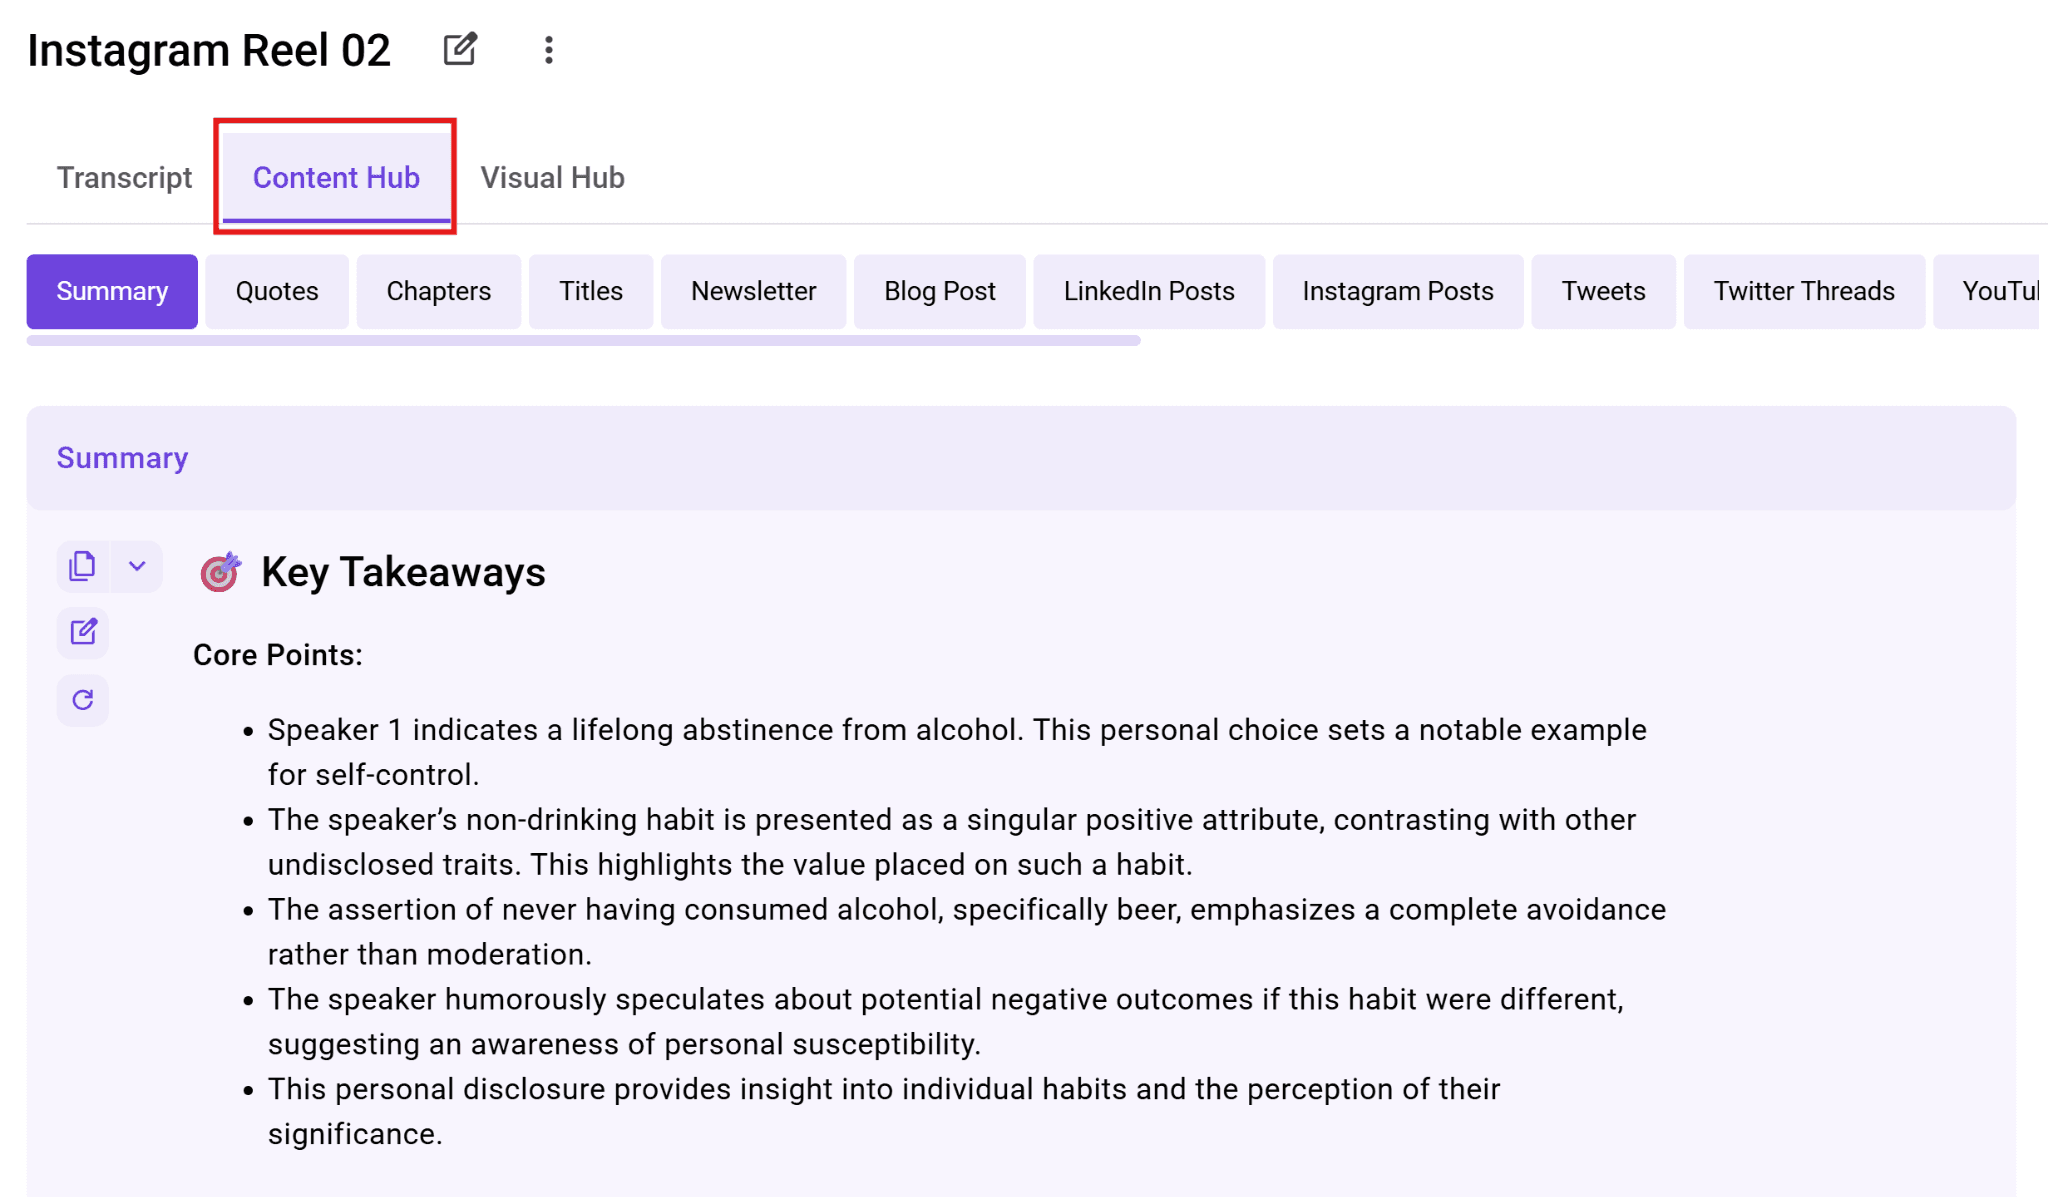
You can also turn the transcript into blog posts, social media snippets, reports, show notes, or newsletters. These content types are available once you switch to the “Content Hub” tab.
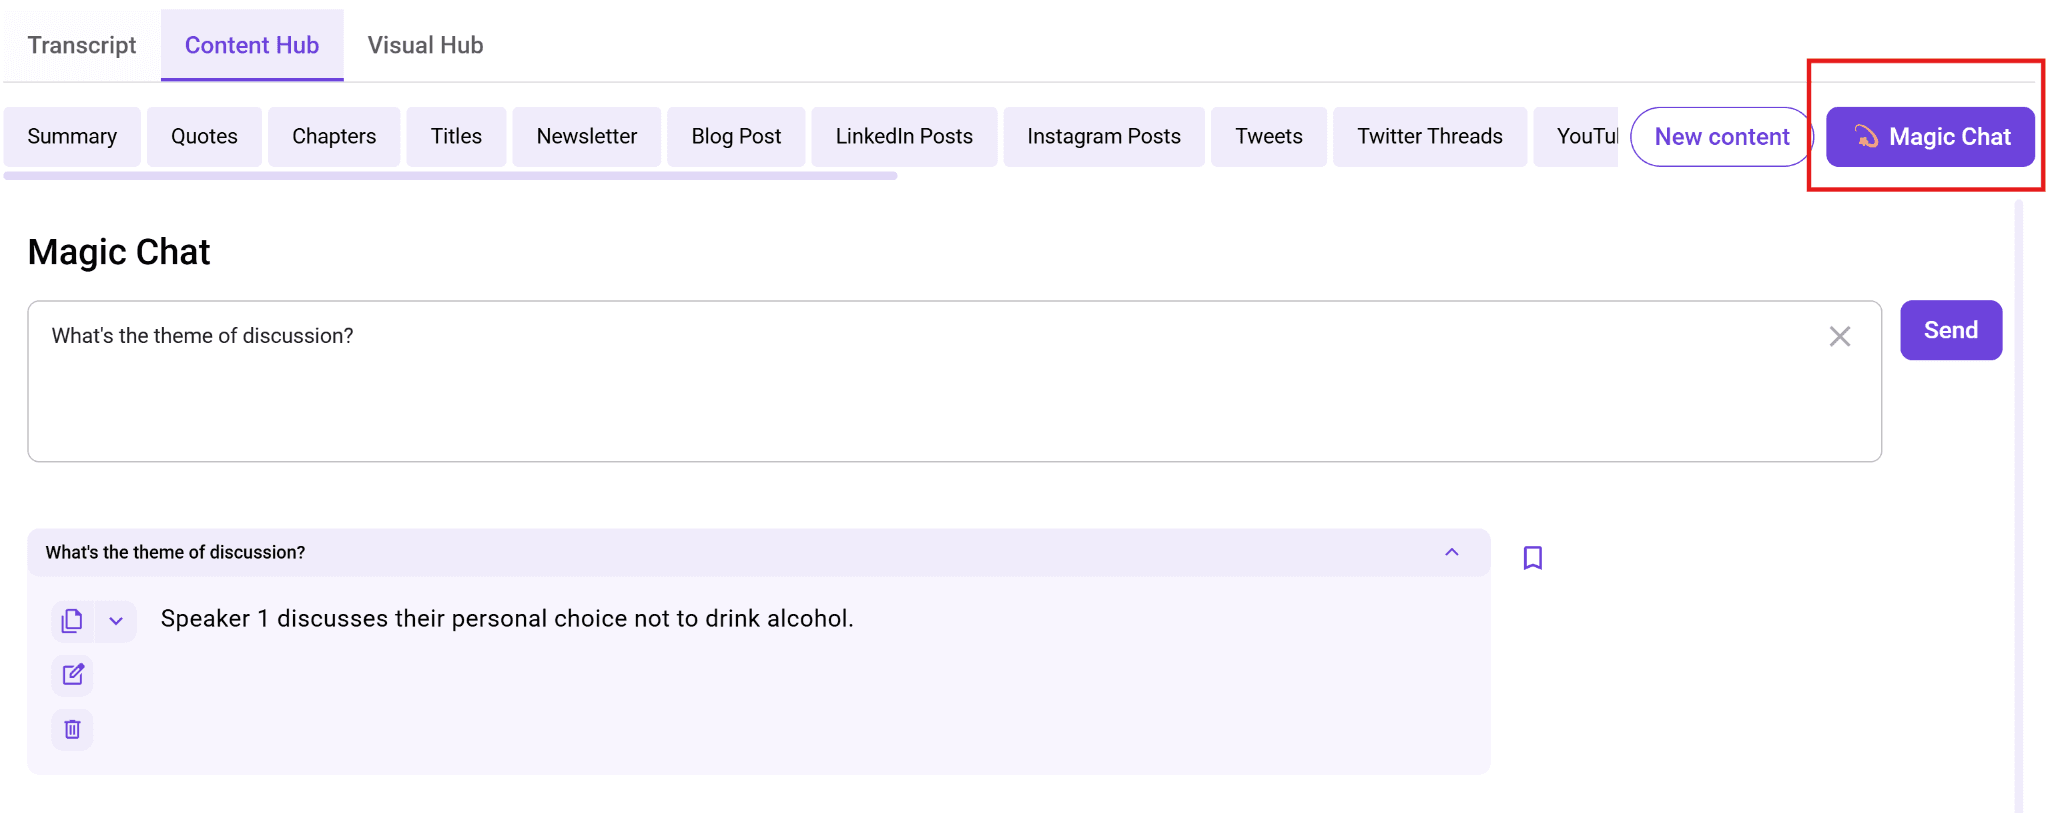
You can use our Magic Chat feature to ask direct questions and get insights out of your transcript. Instead of reading the whole text, you can ask the AI, "What’s the theme of the discussion?"
Finally, you can also export your Instagram Reel transcript as a Word document, a text file, or SRT subtitles if you want to add captions to another video.
Best Practices for Transcribing Instagram Reels
Transcribing Instagram Reels is simple, but a few small adjustments can improve your results and save time.
Start with clear audio: The better the audio, the better the transcript. Always use the highest quality version of the Reel to reduce errors during transcription.
Prioritize readability over raw accuracy: A word-for-word transcript isn’t always useful. Clean up filler words, fix grammar, and break long sentences into shorter ones for better clarity.
Format based on your end goal: Think about how you’ll use the transcript. Captions need short lines, while blog posts or emails require full sentences and structure.
Keep your formatting consistent: If you’re working on multiple Reels, use the same structure across all transcripts. This keeps your content clean and easier to manage.
Repurpose immediately: Don’t let transcripts sit unused. Turn them into captions, summaries, social posts, or blog content as soon as possible to maximize value.
Transcribe Instagram Reels Faster and Better With WhisperTranscribe
Transcribing Instagram Reels helps you unlock and reuse valuable content. While the manual method works for occasional use, it quickly becomes slow and difficult to maintain. If you want a faster and more reliable workflow, it makes sense to switch to a tool like WhisperTranscribe.
Our tool helps you turn Instagram Reels into accurate transcripts in minutes. It also lets you edit, format, translate, and repurpose your content, so you get more value from every video without the manual effort.
Try WhisperTranscribe for free and start transcribing your Instagram Reels faster.

