
Our Guide on How to Transcribe an M4A Audio File on Mac and Windows Computers

Quick Summary
This guide explains how to transcribe M4A audio files efficiently using built-in Mac/Windows tools or WhisperTranscribe. It covers step-by-step instructions for both platforms, highlights best practices for accurate and organized transcripts, and shows how WhisperTranscribe makes transcription faster, easier, and ready for content repurposing. Visit our blog for more practical guides.
Struggling to Transcribe an M4A Audio File?
M4A files are common, especially from voice memos, podcasts, and recorded meetings. But turning them into text is not always straightforward. Playback issues, long recordings, and multiple speakers can slow you down fast.
In this WhisperTranscribe guide, you will learn how to transcribe an M4A audio file step by step. We will cover two proven methods, when to use each, and how to handle common challenges so you can produce accurate, usable transcripts.
Why Listen to Us?
At WhisperTranscribe, we help thousands of users transcribe audio files, including M4A, every day. We understand the common challenges with file formats, playback, and accuracy. This guide is based on real workflows and practical use, so you can handle your M4A files with confidence and get reliable transcripts quickly.
What is M4A Audio File Transcription?
M4A audio file transcription is the process of converting audio stored in an M4A format into written text. Apple developed M4A (MPEG-4 Audio) as an improvement over MP3. It is the default format for Voice Memos on iPhones and iPads, but it also works on most modern Windows and Android devices.
M4A vs. MP3 and Other Audio Formats
M4A files use advanced compression, which keeps sound quality high while reducing file size. Compared to common formats like MP3 or WAV, M4A has advantages like better audio quality, smaller storage size, and wide compatibility. These benefits make them easier to work with during transcription.
Why Transcribe M4A Audio Files?
When done properly, transcribing an M4A audio file helps you:
Turn audio into searchable text
Extract quotes and key insights quickly
Repurpose content into blogs, reports, or posts
Keep accurate records without replaying the file repeatedly
In short, M4A is often the “sweet spot” for transcription. It gives you clear audio without the large file size of uncompressed formats like WAV.
Next, let’s look at the two methods of transcribing your M4A audio files.
Method 1: How to Transcribe an M4A Audio File Using Built-In Mac and Windows Apps
This method uses the tools already on your computer. It is a good choice for short M4A recordings or one-time tasks. Because M4A is a modern format, both Windows and Mac have features to help you.
Most devices also play these files without any conversion. The key is to follow a structured process to manage playback and typing easily.
How to Transcribe an M4A Audio File on Mac
If you use macOS Sequoia or later, you can use the built-in Notes app. This allows you to generate text directly within your notebook.
Open Notes and create a new note: Launch the Notes app, then click New Note or open an existing note.
Import your M4A audio: Drag your M4A file directly into the note. Your changes will save automatically as you work.
Generate the transcript: Double-click the audio recording to open the transcript panel. A live transcript will appear if your Mac has an M1 chip or later.
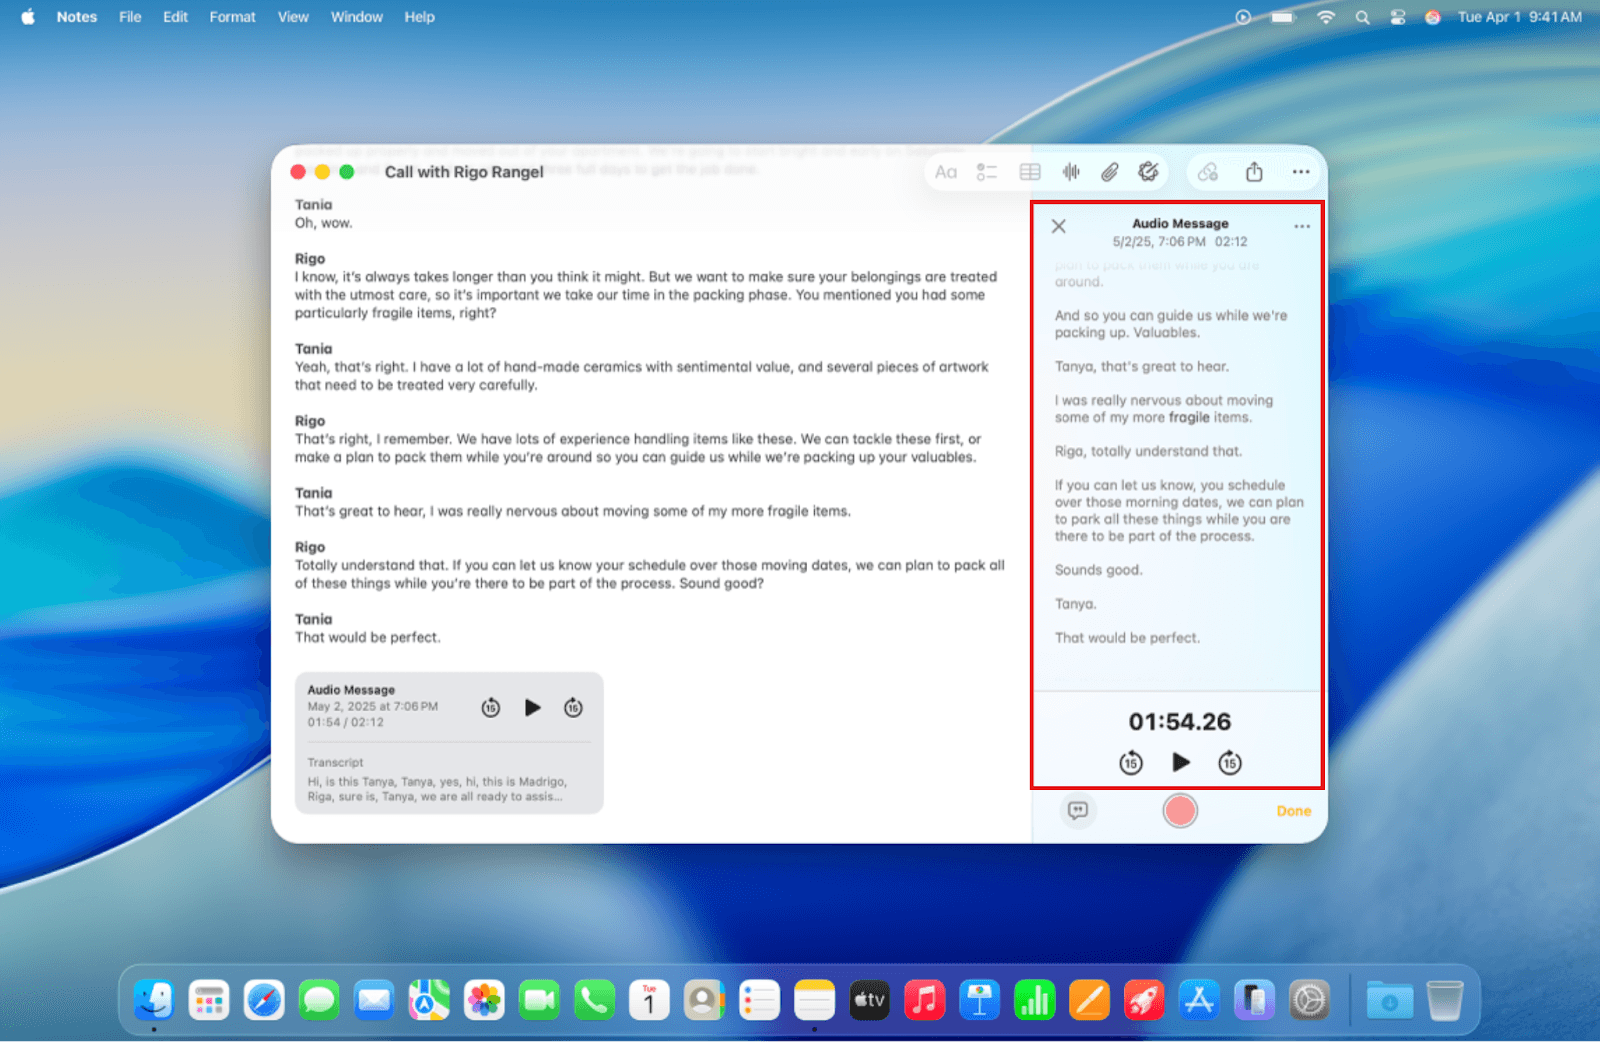
Search the text: Click More and then Find in Transcript to locate specific keywords quickly.
Review and edit: Click any word to jump to that exact spot in the audio. This makes it easy to fix errors or add speaker names.
Copy the text: Click More and select Copy Transcript. You can then paste it into any document for your records.
This approach works well for short interviews or personal recordings. It requires no third-party tools and keeps everything local, but transcription is limited to newer Macs and supported languages.
How to Transcribe an M4A Audio File on Windows
On Windows, you can use the Transcribe feature in Microsoft Word (Microsoft 365), either in the desktop or web version. This is ideal for longer recordings with multiple speakers.
Open Word: Log in to Microsoft 365 or Word online and open a new blank document.
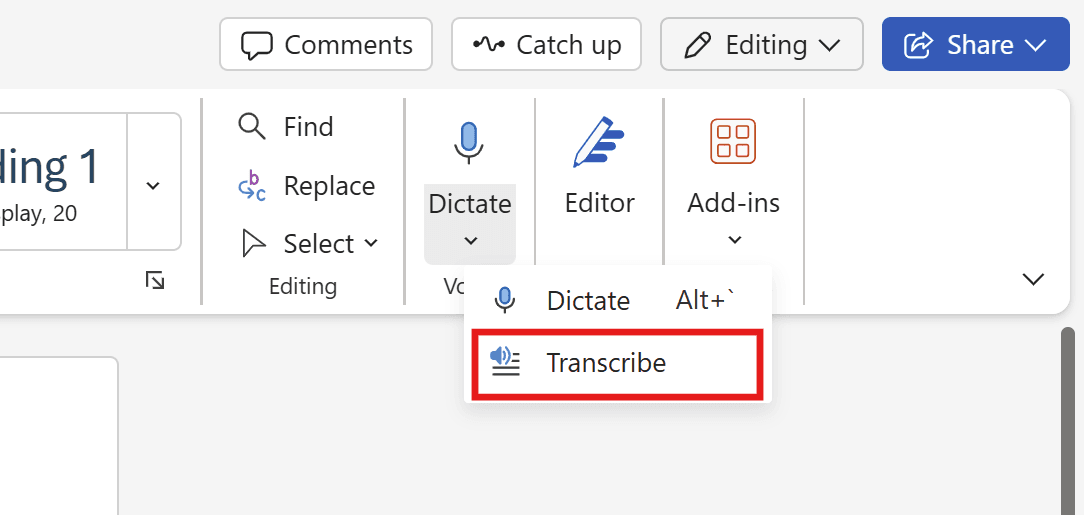
Locate the Transcribe tool: Go to the Home tab and find the Dictate button. Click the small arrow next to it and select Transcribe.
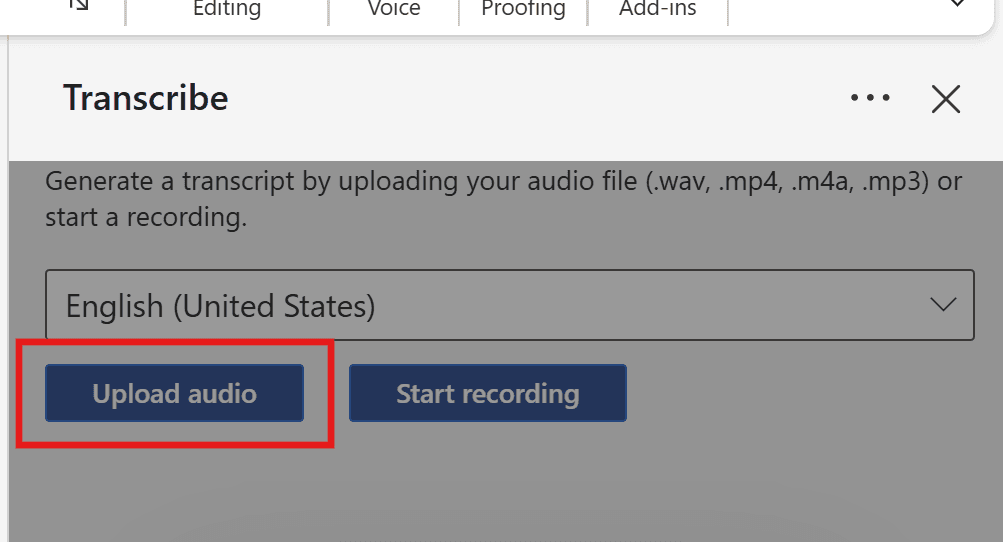
Upload your M4A file: A side panel will appear. Click Upload audio and select your M4A file from your computer folders.
Wait for transcription: Processing may take a few minutes, depending on file size. Keep the Transcribe pane open while it works.
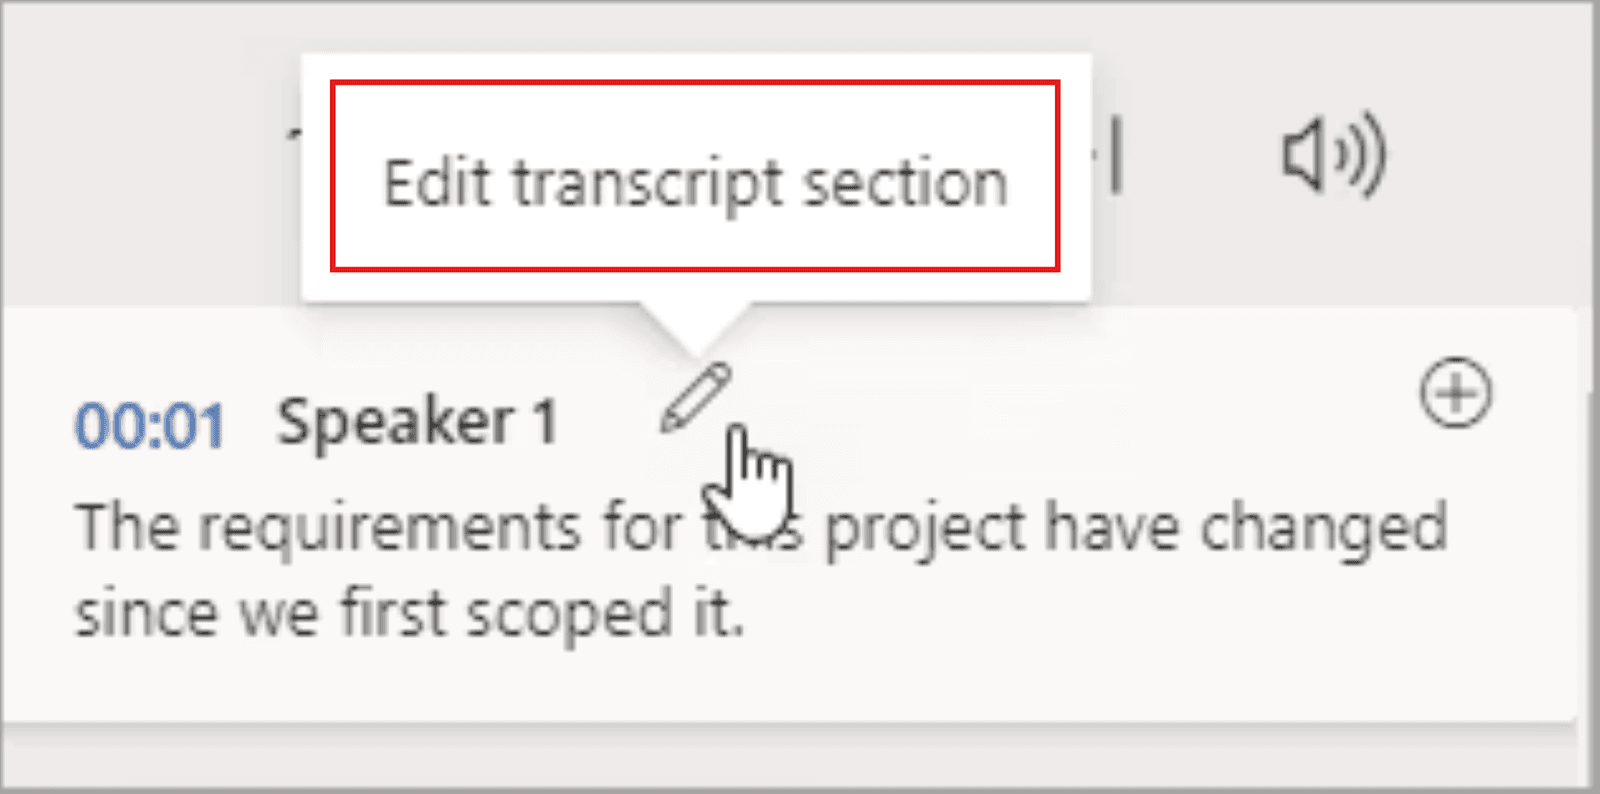
Edit the transcript: Once ready, the full transcript appears with timestamps and speaker labels. Hover over a section and click Edit transcript section to make corrections or relabel speakers.
Insert the transcript: Add the entire transcript to your Word document or specific sections. Use the " Add section to document or Add all to document as needed.
This method is great for longer recordings, interviews, or meetings where you want timestamps and automatic speaker separation. While it requires an internet connection, it saves time compared to fully manual transcription and keeps your audio organized in OneDrive.
Method 2: How to Transcribe an M4A Audio File with WhisperTranscribe
For longer recordings, audios with multiple speakers, or professional use, the built-in transcription features on Windows and Mac might be inadequate. This is where AI transcription, powered by specialized software like WhisperTranscribe, comes in handy.
WhisperTranscribe uses the advanced WhisperAI to transcribe your M4A audio files faster with up to 95% accuracy. It also effectively handles overlapping speech, background noise, and different accents, which can be tricky in compressed formats like M4A.
Let’s see how it works.
Step 1: Download and Install WhisperTranscribe
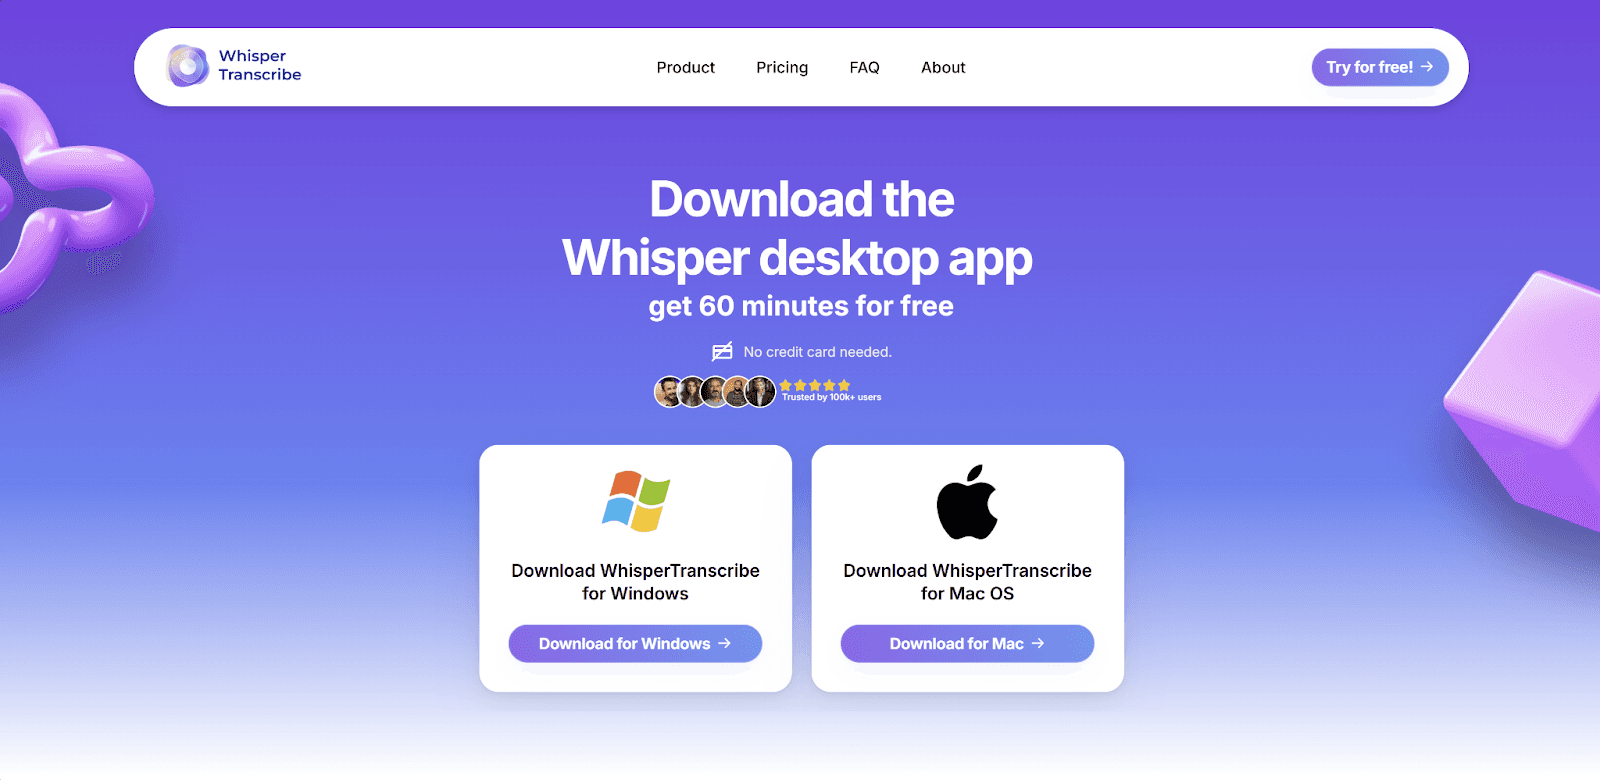
First, visit our website to download the WhisperTranscribe desktop app. Click “Try for Free” to open the download page. Then choose the version that fits your computer, whether you use a Mac or Windows.
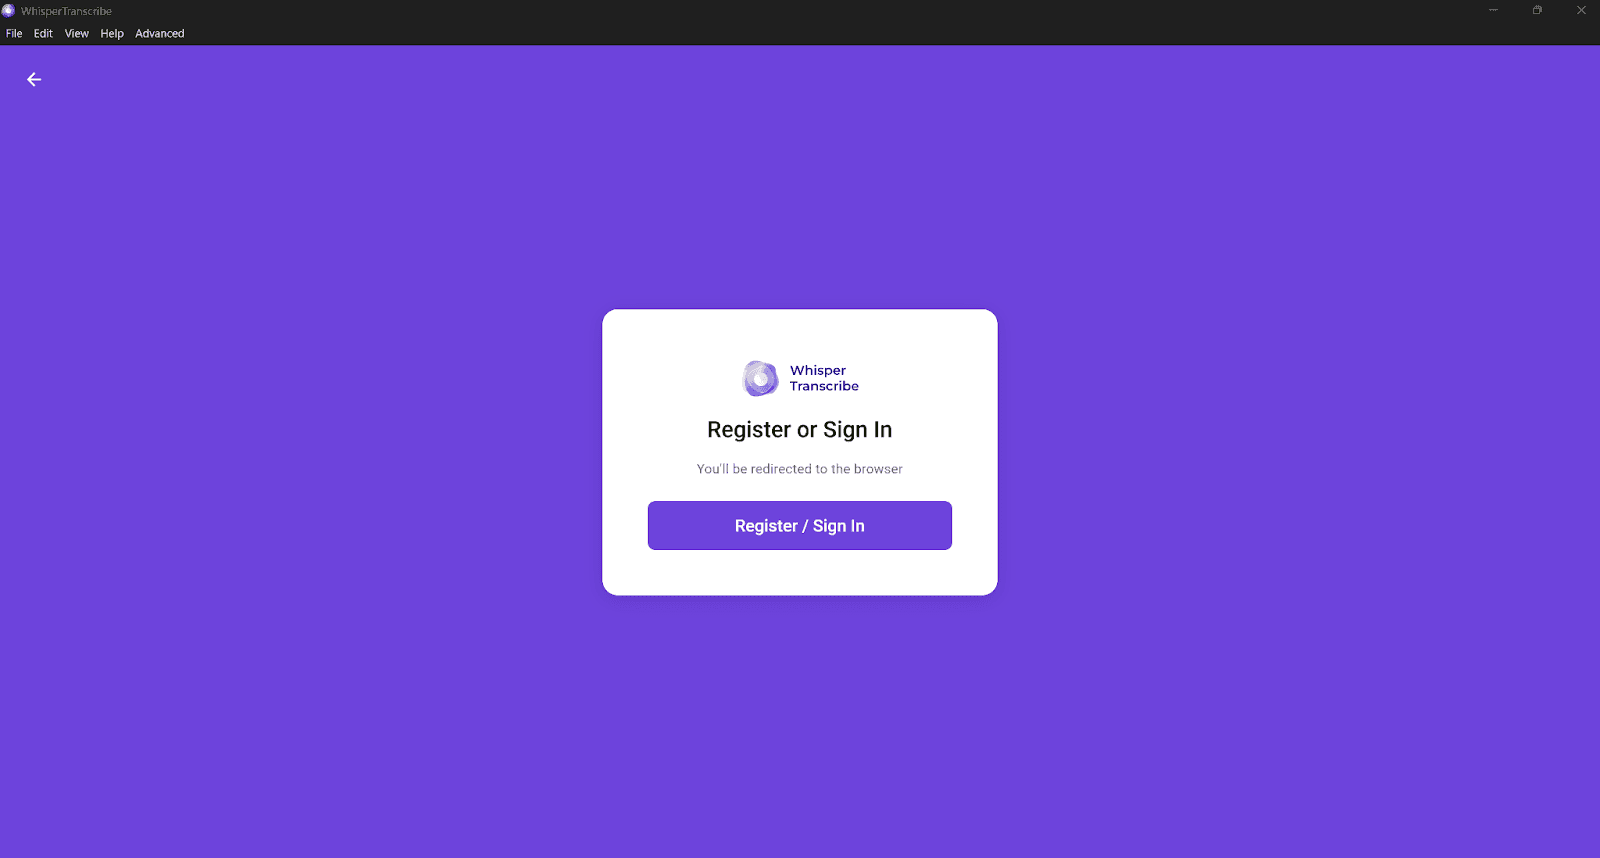
After the download, follow the simple prompts on your screen to complete the installation. Once the app is ready, open it and create your account to begin. Once you have created your account, you will be signed in automatically. Then, you can proceed to the next step to upload your M4A file.
Step 2: Upload Your M4A audio
WhisperTranscribe supports M4A audio files among other popular audio formats. You can upload your M4A audio file(s) in two ways:
Simply drag and drop the M4A file from your computer folders into the window, or
Click “Upload File” and select your M4A recording.

Either way, you can upload up to 10 files at once.
Step 3: Set Your Transcription Parameters
Once your file is selected, tell the AI exactly how to handle it under the “Settings” tab. You can set parameters like:
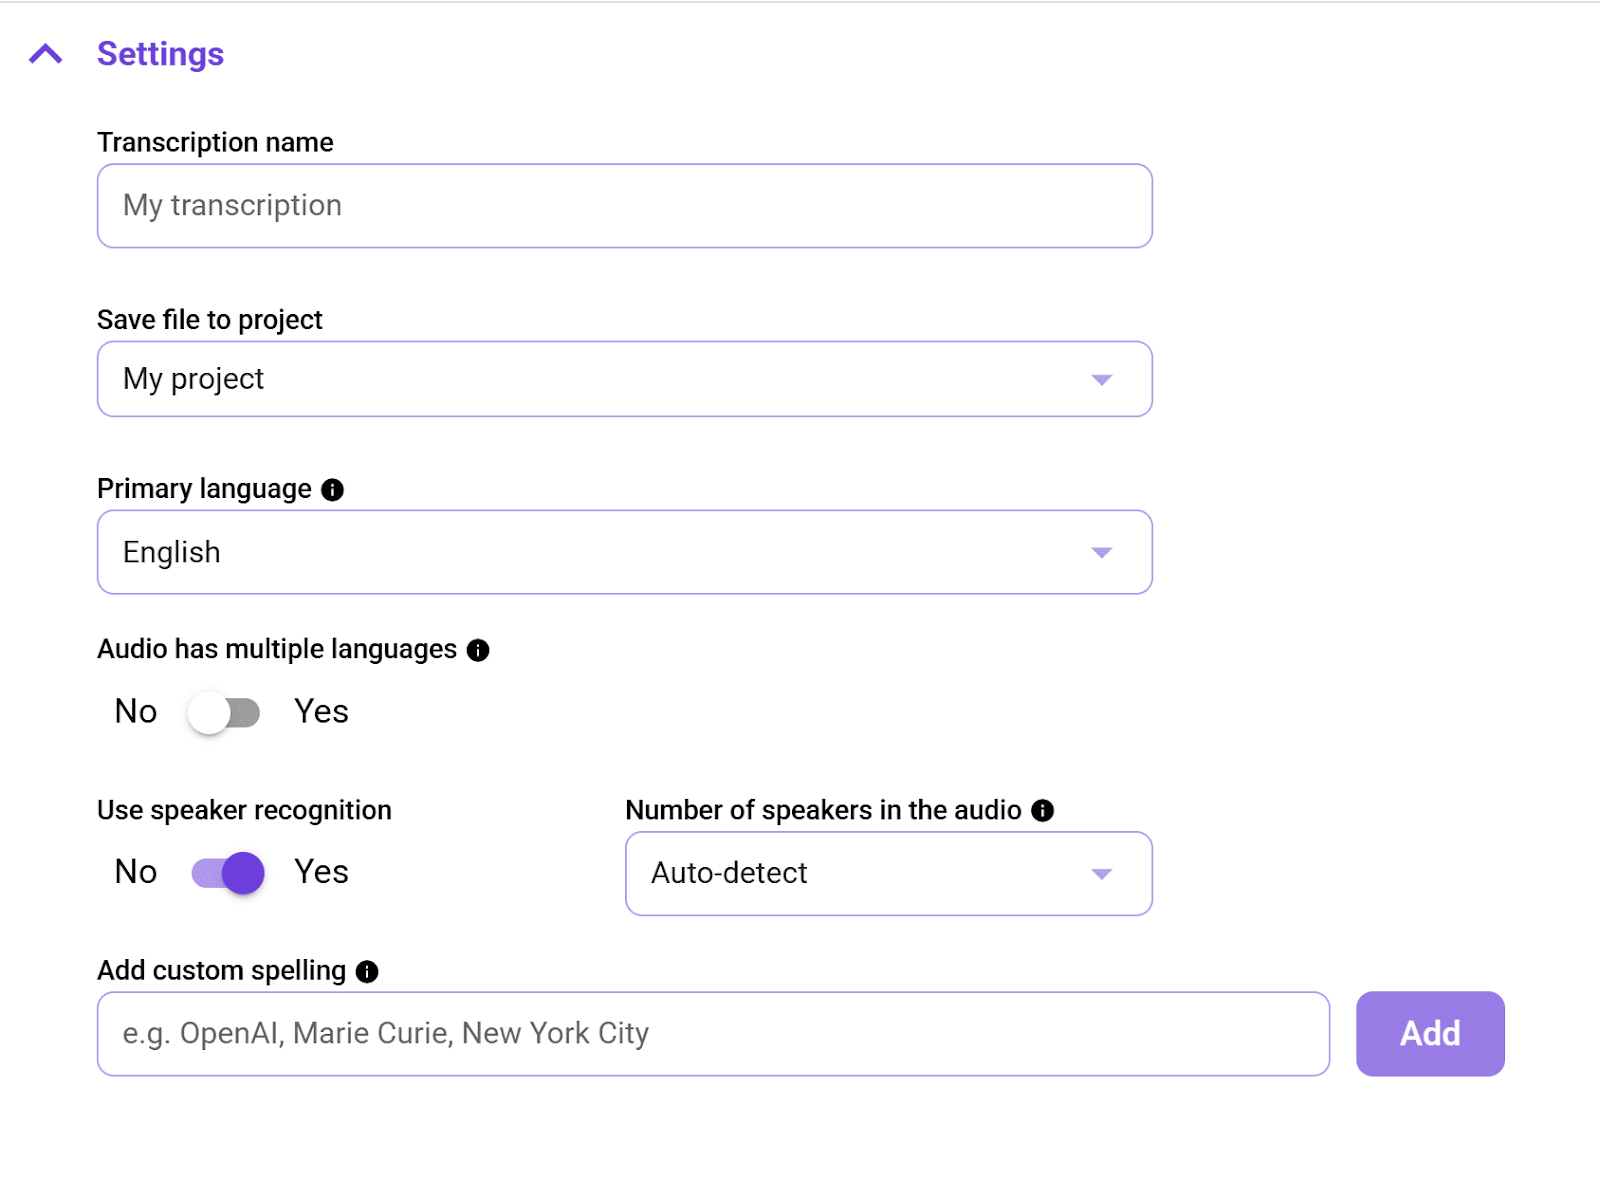
Transcription name: Give your project a clear title to stay organized.
Storage folder: Choose where you want to save the final transcript on your device.
M4A audio language: Select the primary language spoken in the M4A file. We support over 55 languages.
Multiple languages: If your audio has more than one language, toggle on this option. Our transcription AI can detect up to 5 in a single audio file.
Speaker recognition: This is important if the M4A audio you uploaded has multiple speakers. Once you turn on this feature, you can also specify the number of speakers or choose the “Auto detect” option to allow our tool to detect the number of speakers automatically.
This step ensures WhisperAI processes your M4A audio files properly to give you an accurate transcript.
Step 4: Transcribe the Audio
Next, click Transcribe Now and let the AI convert your audio to text. Our AI transcription engine quickly processes your M4A audio, even for long recordings up to ~5GB. It also provides real-time progress so you can see how long the process will take.
Tip: If you’re working with a large M4A file, you can continue working on other tasks while your file is being processed.
Step 5: Review and Edit
Once the transcript is ready, it automatically opens in our built-in editor. From here, you can:
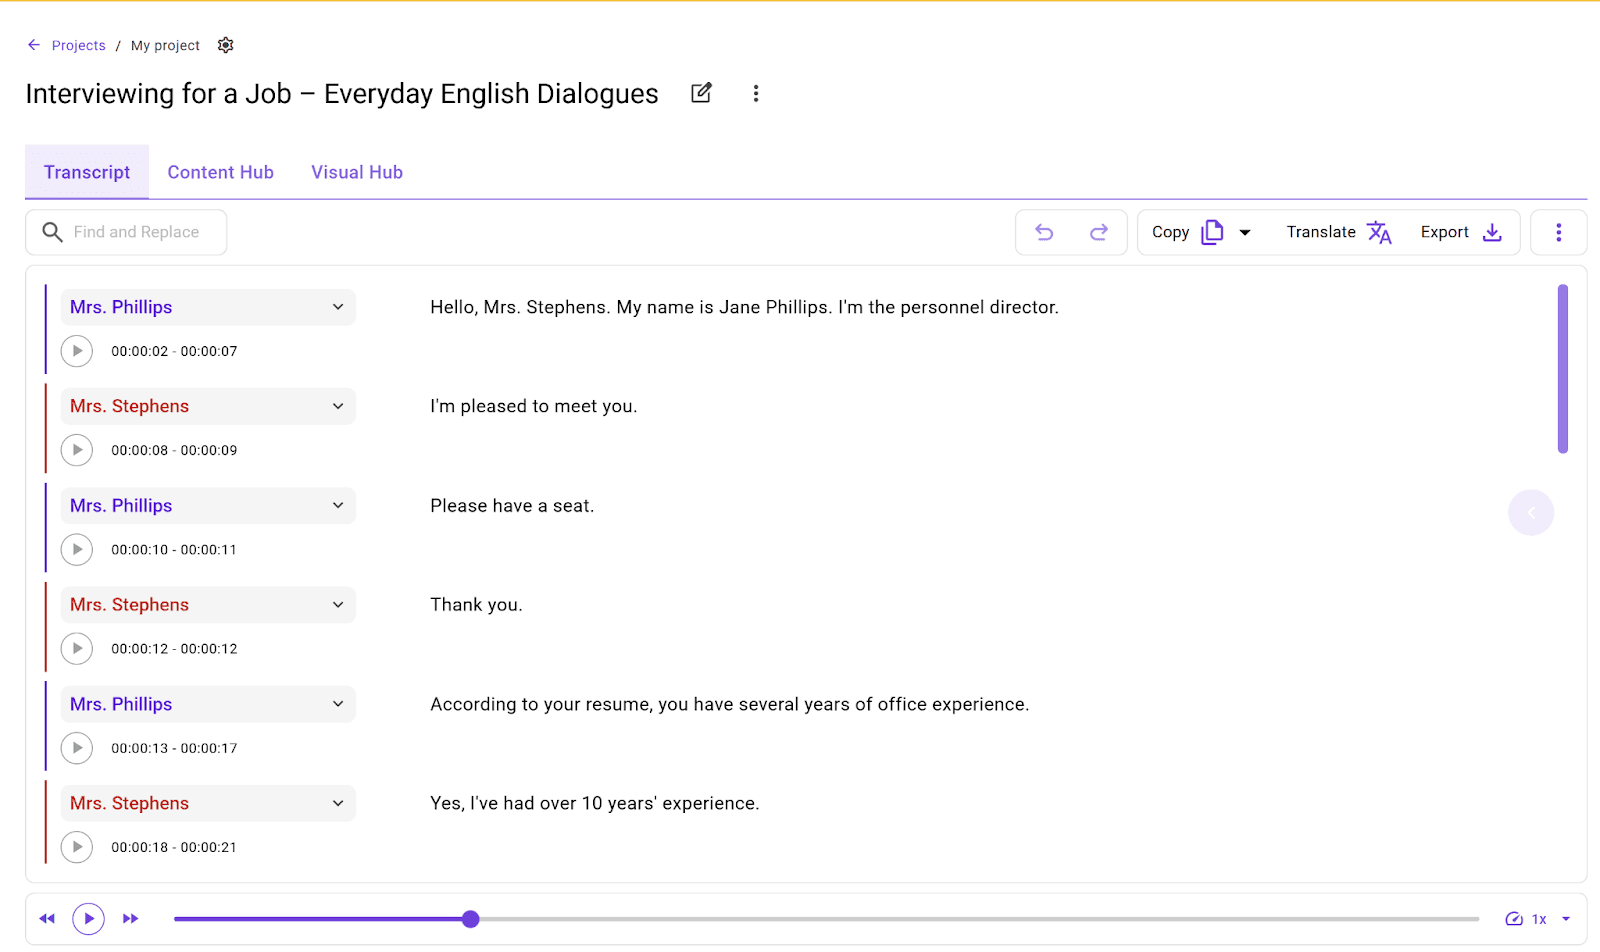
Listen and follow along: Play any section to hear the audio while reading the text.
Correct errors: Fix any minor typos or unclear words directly in the interface.
This step ensures your transcript is fully accurate without hours of manual typing.
Step 6: Translate, Export, and Repurpose
WhisperTranscribe goes beyond basic transcription. You can also translate and repurpose your M4A content.
Translation: Convert your transcript into 99+ languages while keeping the timing intact. Simply click the “Translate” button and pick your preferred language.

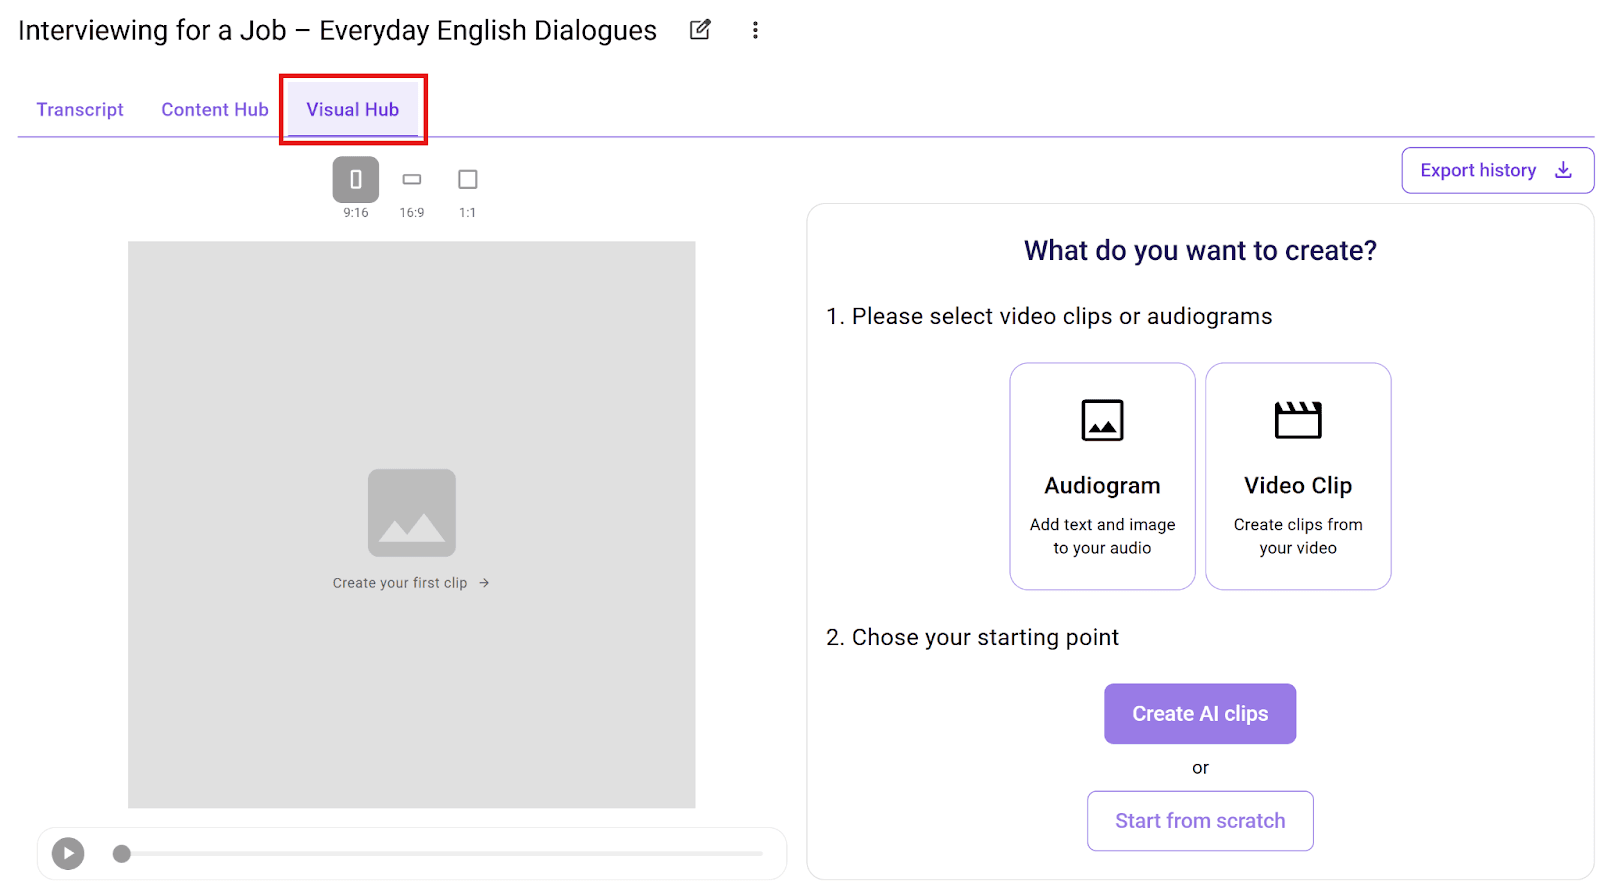
Create video clips: If you want to share highlights, use the automated clip creation in the “Visual Hub” tab. Our AI Clip Finder helps you extract key moments for social platforms.
Content repurposing: Turn your transcript into blog posts, social media snippets, shownotes, or reports. Click the “Content Hub” tab and choose your preferred content type.

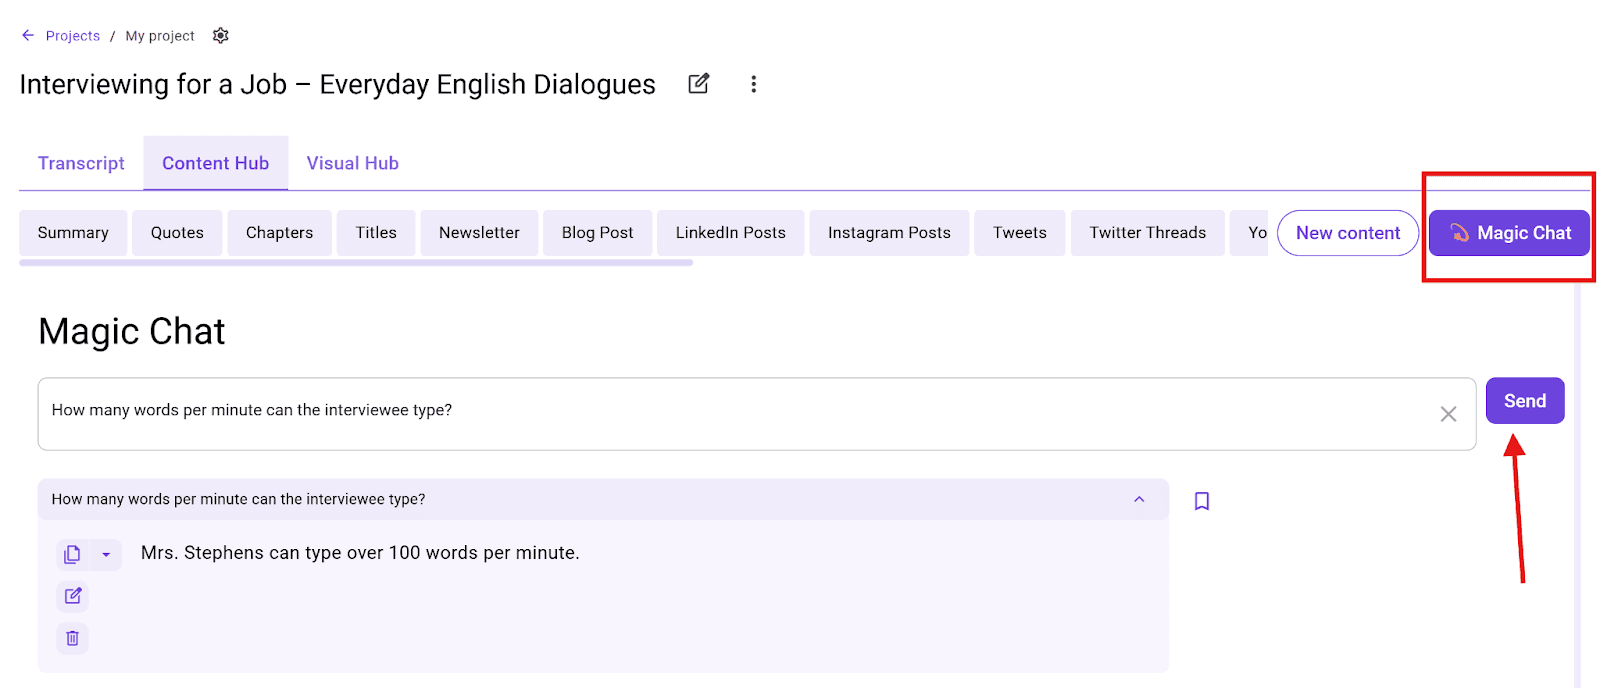
Magic Chat: Use the Magic Chat feature to talk to your transcript. You can ask the AI, "What were the main points?" or "Write a summary of this recording."
Finally, you can export the file as a Word document, a text file, or even SRT subtitles if you want to add captions to a video.
Which is the Right Transcription Method for Your M4A Audio?
Choosing the right method depends on your file length and how you plan to use the text. While built-in tools are great for quick notes, WhisperTranscribe offers a more powerful solution for professional work.
Feature / Criteria | Built-In Mac & Windows Apps | WhisperTranscribe |
Ease of Use | Requires manual setup and file management; steps differ by OS | Single interface for Mac & Windows; intuitive upload and transcription process |
File Size Support | Limited by app capabilities; long files can be cumbersome | Handles files up to ~5GB easily |
Accuracy | Good for clear, short recordings; errors increase with background noise or multiple speakers | 95%+ accuracy; handles accents, background noise, and multiple speakers |
Speaker Recognition | Mac: limited; Windows: automatic but may need manual relabeling | Automatic, editable, and accurate labeling of multiple speakers |
Timestamps | Manual entry (Mac) or auto with Word (Windows) | Automatic timestamps with easy navigation |
Editing & Search | Manual review and editing; search depends on the document | Built-in search, edit, and jump-to-audio features |
Content Repurposing | None | Generate 57+ content types: summaries, blog posts, social media snippets, subtitles |
Privacy | Local (Mac) or cloud storage (Windows OneDrive) | Local storage + cloud processing; users retain full ownership of transcripts |
Speed | Slow, especially for long files | Fast, even for long recordings, with background processing |
Cross-Platform | Separate processes for Mac vs Windows | Same workflow for Mac and Windows |
Best Practices for Transcribing M4A Audio
Even with powerful tools, following some best practices can make your transcripts cleaner, faster, and easier to use:
Check your recording quality first: Clear audio reduces errors and the need for extensive editing. A quick 30-second test before you start can save hours of correction later.
Use a reliable transcription software: Using an AI-powered transcription software can save you hours of work while ensuring accuracy, especially if you have clips that span several hours.
Organize your audio files: Label files with dates, topics, or speakers before uploading to make them easier to locate later.
Back up your original files: Always store your M4A files in a secure location or cloud folder. This prevents accidental loss if your local device has an issue.
Automate repetitive work: Use transcription software even for short recordings. This saves your energy for the actual analysis of the content rather than the typing.
Experience Faster, Smarter M4A Audio Transcription with WhisperTranscribe
Transcribing M4A audio files can save time, improve organization, and make your recordings searchable and actionable. Using built-in Mac/Windows apps gets the job done, but at a slow speed and with far less accuracy.
WhisperTranscribe offers a superior solution for transcribing an M4A audio file. As an AI-powered tool running on WhisperAI, it’s designed to handle M4A files of any size, recognize multiple speakers, and automatically generate transcripts ready for editing, searching, and repurposing.
Try WhisperTranscribe for free today and start transcribing your M4A files faster.

