
How to Transcribe an Audio File Using Whisper (No Coding Required)

Quick Summary
This guide explains how to transcribe an audio file using Whisper, OpenAI’s speech recognition model. You’ll learn what Whisper is, how it works, and how to use it to convert audio files into text without writing a single line of code. For more practical transcription guides, see the WhisperTranscribe blog.
Want to Use Whisper Without the Technical Setup?
OpenAI’s Whisper model is one of the most accurate speech-to-text systems for converting audio into text. But using it directly means installing Python, working from the command line, and configuring a local development environment before you can even process a file. For most users, that setup is harder than the transcription task itself.
Instead of running Whisper manually, you can use a Whisper-powered application that handles the setup for you. You upload an audio file, choose your transcription settings, and generate a transcript without installing packages or running terminal commands.
This WhisperTranscribe guide explains how to transcribe audio files using Whisper in a no-code workflow while preserving the accuracy the model is known for across interviews, meetings, podcasts, and other real-world recordings.
Why Listen to Us?
WhisperTranscribe is built directly on OpenAI's Whisper model. We've processed thousands of audio files across 55+ languages for creators, researchers, journalists, and business teams. We know where the model performs well, where it needs help, and how to get the most accurate results from it. This guide is based on that experience.
What Is Whisper?
Whisper is an open-source automatic speech recognition (ASR) model developed by OpenAI and released in September 2022. It was trained on 680,000 hours of multilingual audio data collected from the internet, giving it strong performance across a wide range of languages, accents, audio conditions, and recording environments.
Unlike many transcription systems trained primarily on clean studio audio, Whisper also handles real-world recordings well, including phone calls, podcast interviews, noisy conference rooms, and voice memos recorded on a phone. It is more robust than older ASR models in noisy and conversational settings.
This performance comes from training on diverse audio data, including interviews, lectures, podcasts, and informal conversations. As a result, it can still produce usable transcripts when speech is fast, unstructured, or when speakers interrupt each other during natural conversation.
How to Transcribe an Audio File Using Whisper
There are two ways to use Whisper.
Directly via the command line: You install Python, set up a virtual environment, install the Whisper package via PIP, and run it from the terminal. This approach requires comfort with development tools, but it gives you more control over how transcription runs, including model size, output format, and processing settings.
Via a Whisper-powered application: Tools like WhisperTranscribe use the same Whisper model but remove the setup layer. You upload a file, choose basic settings like language or speaker detection, and get a transcript without installing anything or running commands. This is designed for users who want the output, not the technical configuration behind it.
The command-line option is typically used by developers or teams integrating Whisper into custom workflows. For most creators, marketers, researchers, and professionals working with recordings, the application-based approach is faster to start with and easier to repeat across multiple files.
That is what we explain in the steps below:
1. Download and Install WhisperTranscribe
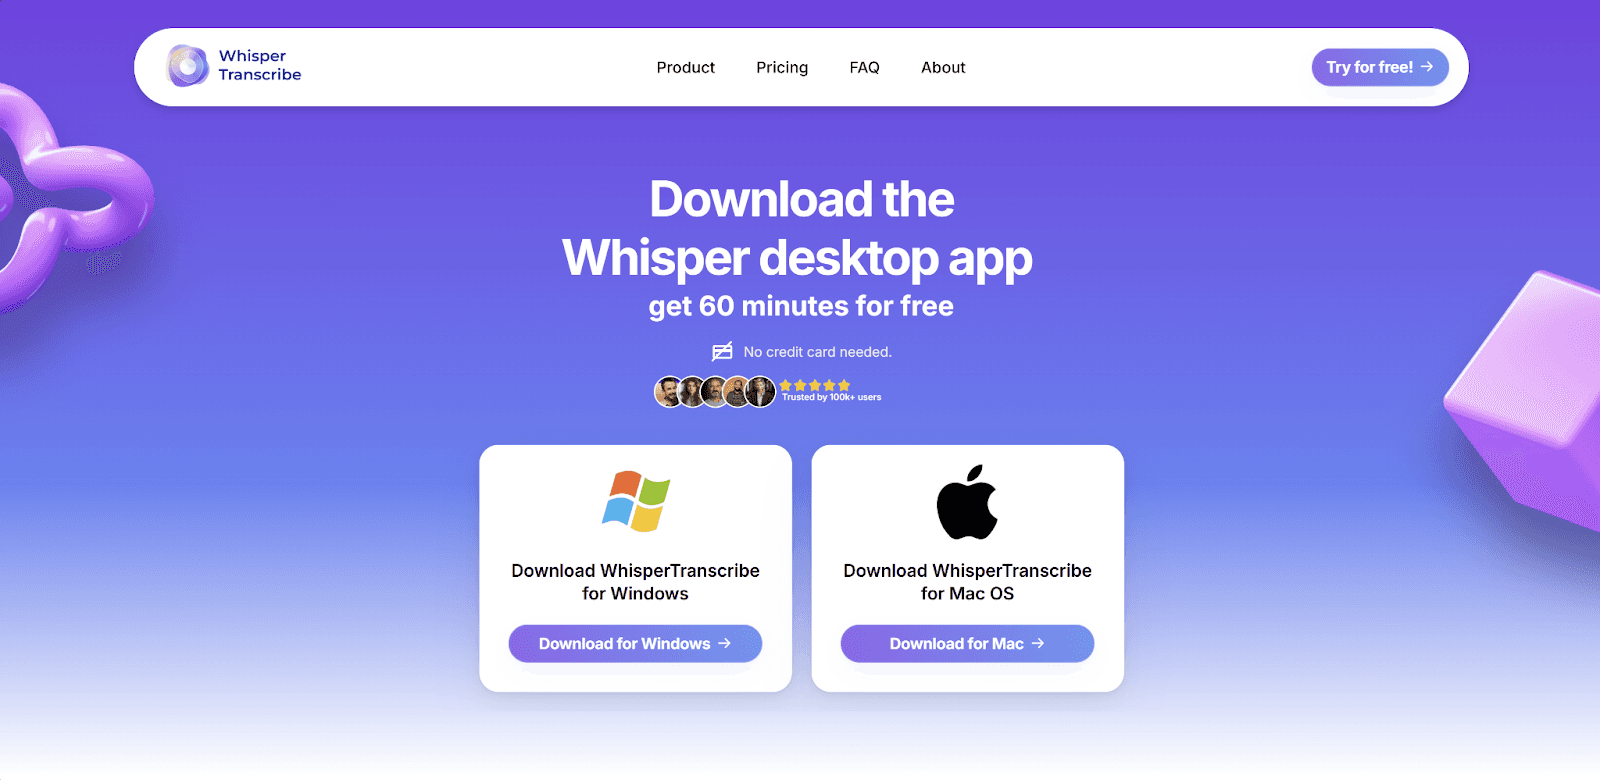
Go to whispertranscribe.com and click "Try for Free." You will be taken to the download page, where you can choose the Mac or Windows version. Download the installer and follow the on-screen prompts. Installation is quick and straightforward. After setup, create your account, and you can start uploading audio files.
2. Prepare Your Audio File
Before uploading, check your file. WhisperTranscribe accepts most common audio and video formats, including MP3, MP4, WAV, M4A, FLAC, MOV, and more, so format is rarely an issue.
What matters more is audio quality. If your recording has significant noise or overlapping speech, the transcript will still be usable, but you will spend more time editing it. Where possible, use the highest-quality version of the file available.
3. Upload Your Audio File
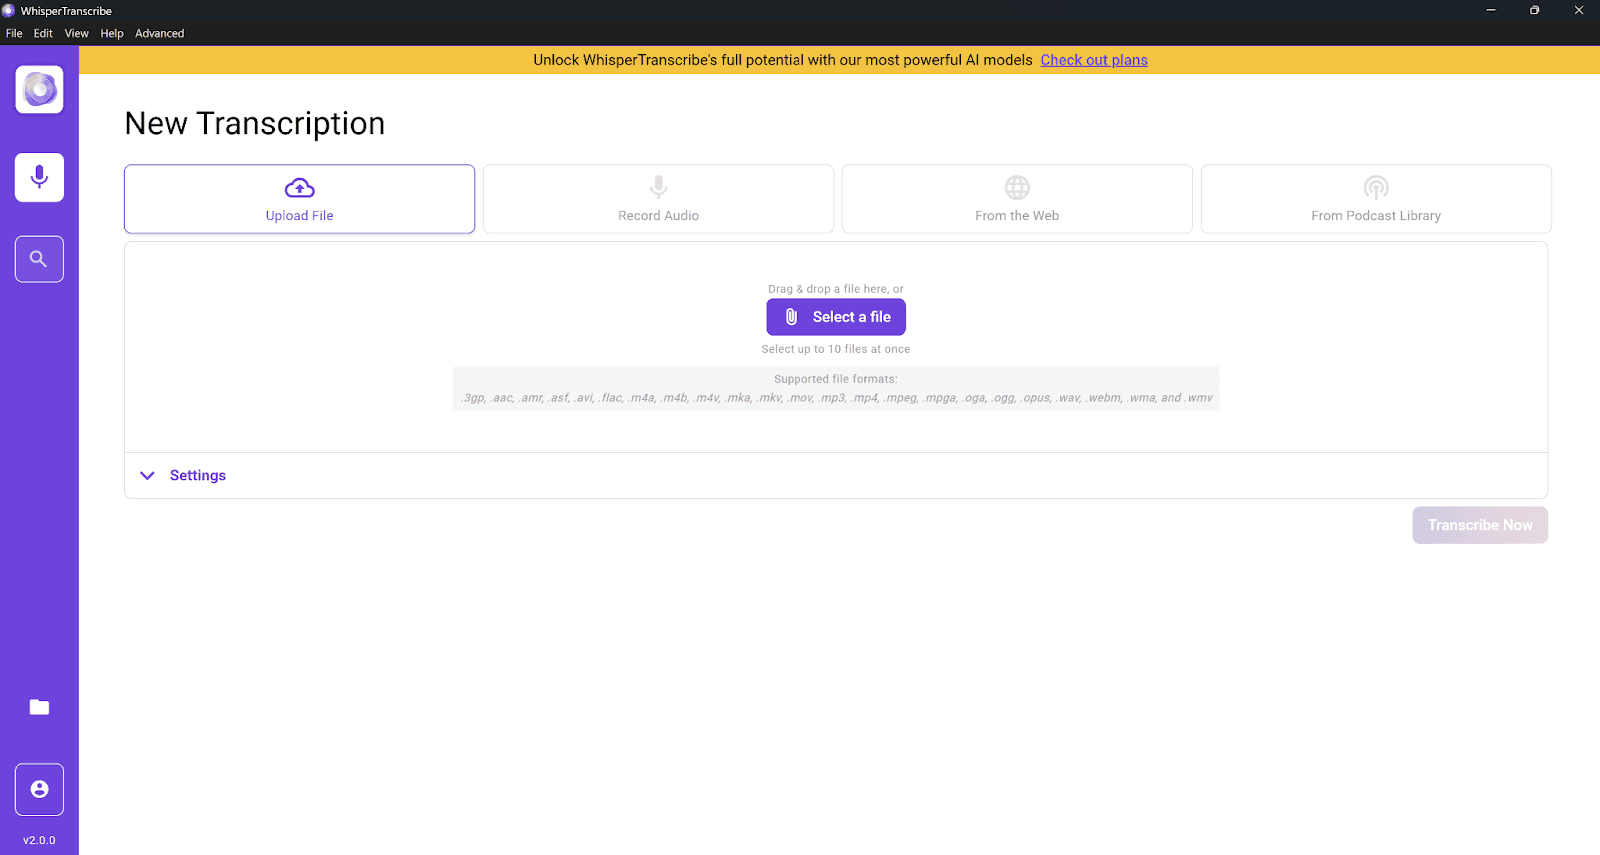
From your dashboard, click "Upload File" to import audio from your computer. If the audio is online, such as a YouTube video, podcast episode, or public URL, you can paste the link using the "From the Web" option instead. WhisperTranscribe will process it after upload.
For batch work, you can upload up to 10 files at once, which is useful when transcribing a series of interviews, podcast episodes, or recorded meetings in one go. The upload time depends on file size and connection, and larger files may take slightly longer. The upload typically completes quickly, even for larger files.
4. Configure Your Transcription Settings
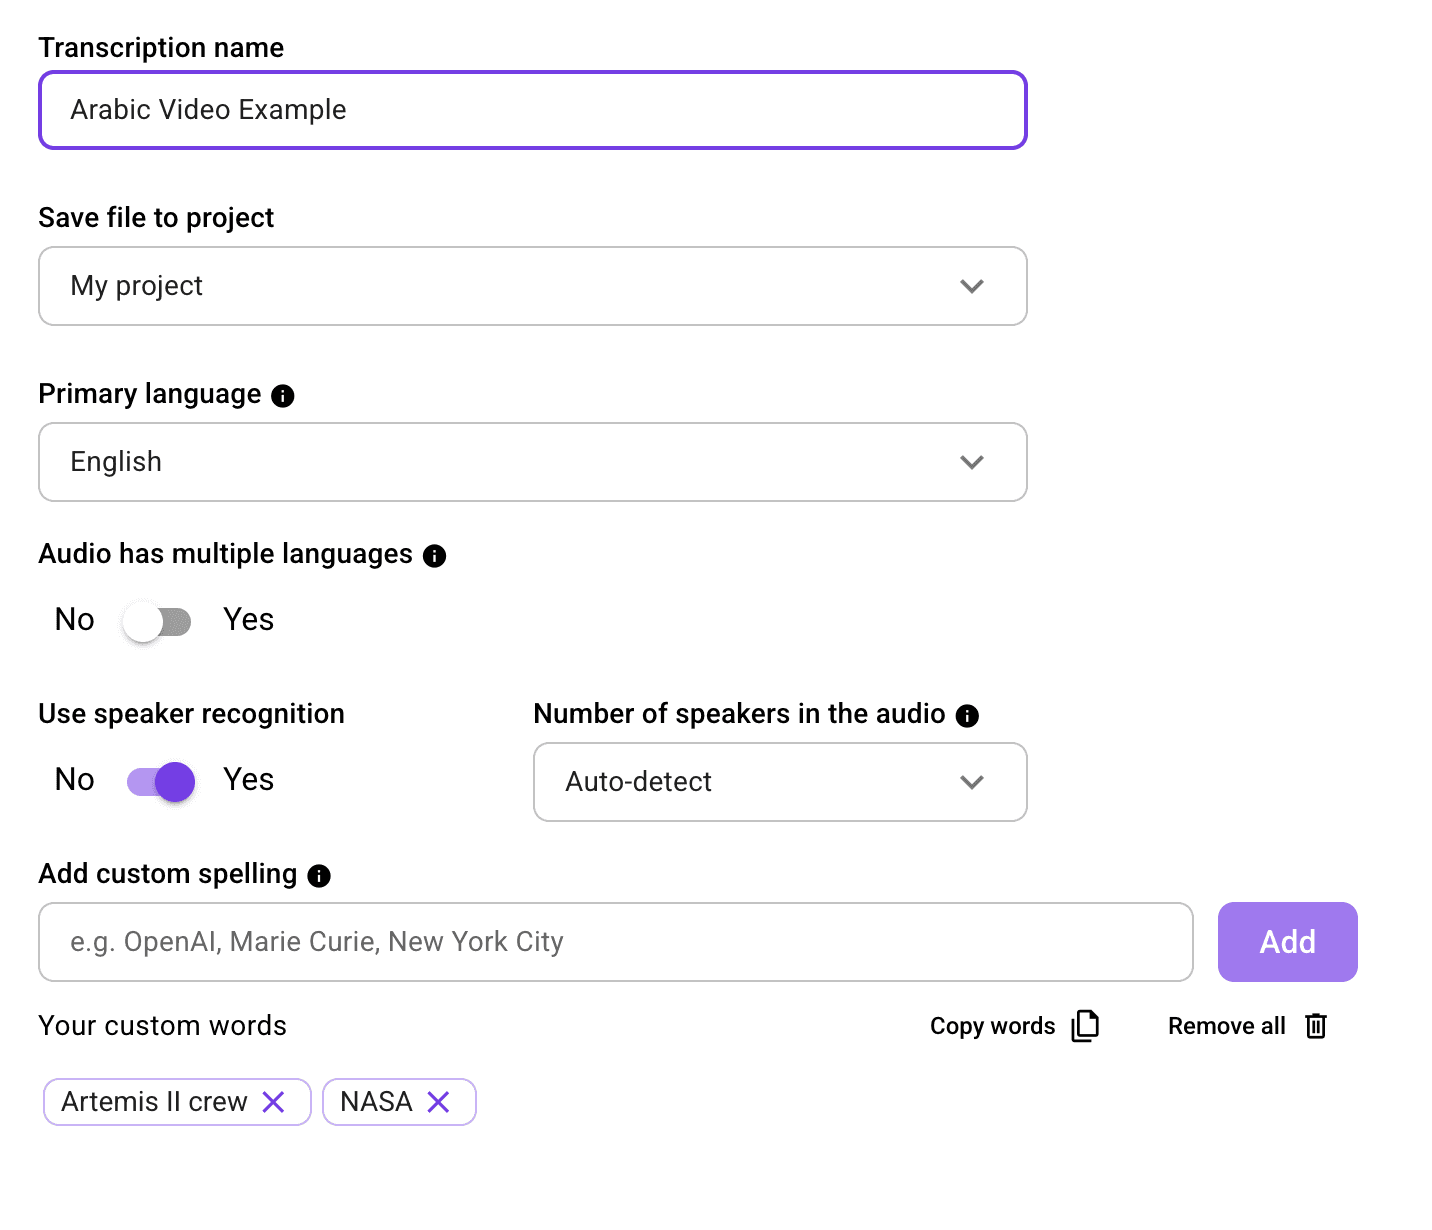
Before processing starts, you will need to configure the following:
Transcript name: Give it a clear, descriptive name so it is easy to find.
Primary language: Select the main language spoken in the audio.
Multiple language detection: Enable this if speakers switch between two or more languages during the recording.
Speaker recognition: Turn this on for recordings with more than one speaker.
Output location: Choose where the transcript will be saved. If you are using WhisperTranscribe as a desktop app, files remain stored locally on your device.
5. Run the Transcription
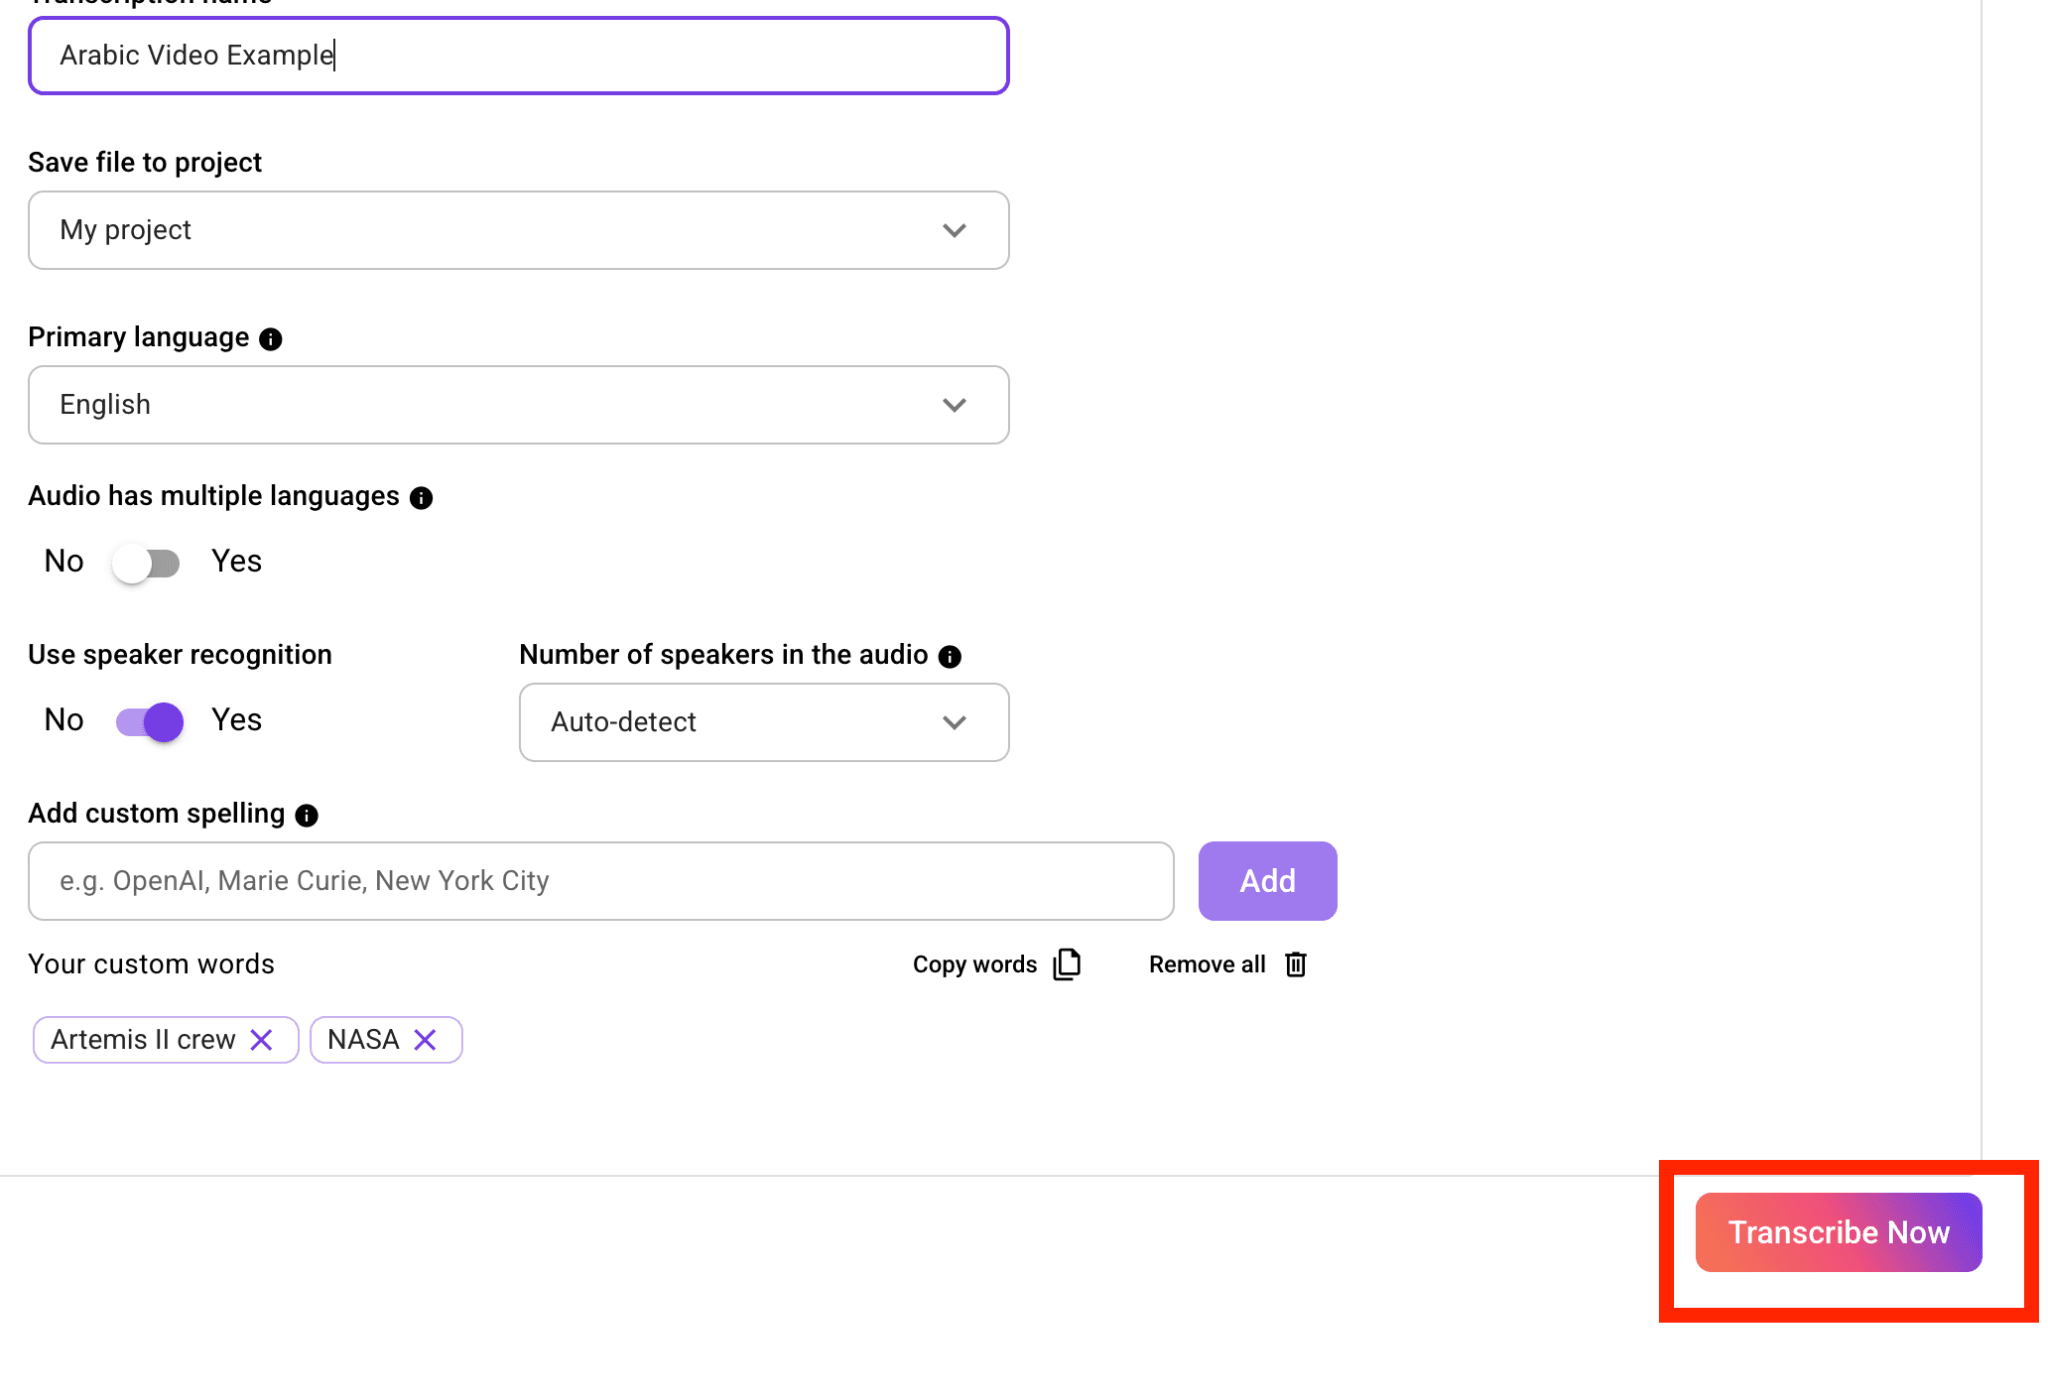
Click "Transcribe Now." WhisperTranscribe sends your file through the Whisper model and begins transcribing your audio. Processing time depends on the length of the recording.
You do not need to stay on the screen. You can continue working while WhisperTranscribe processes the file. You will be notified when it is ready.
6. Review & Edit
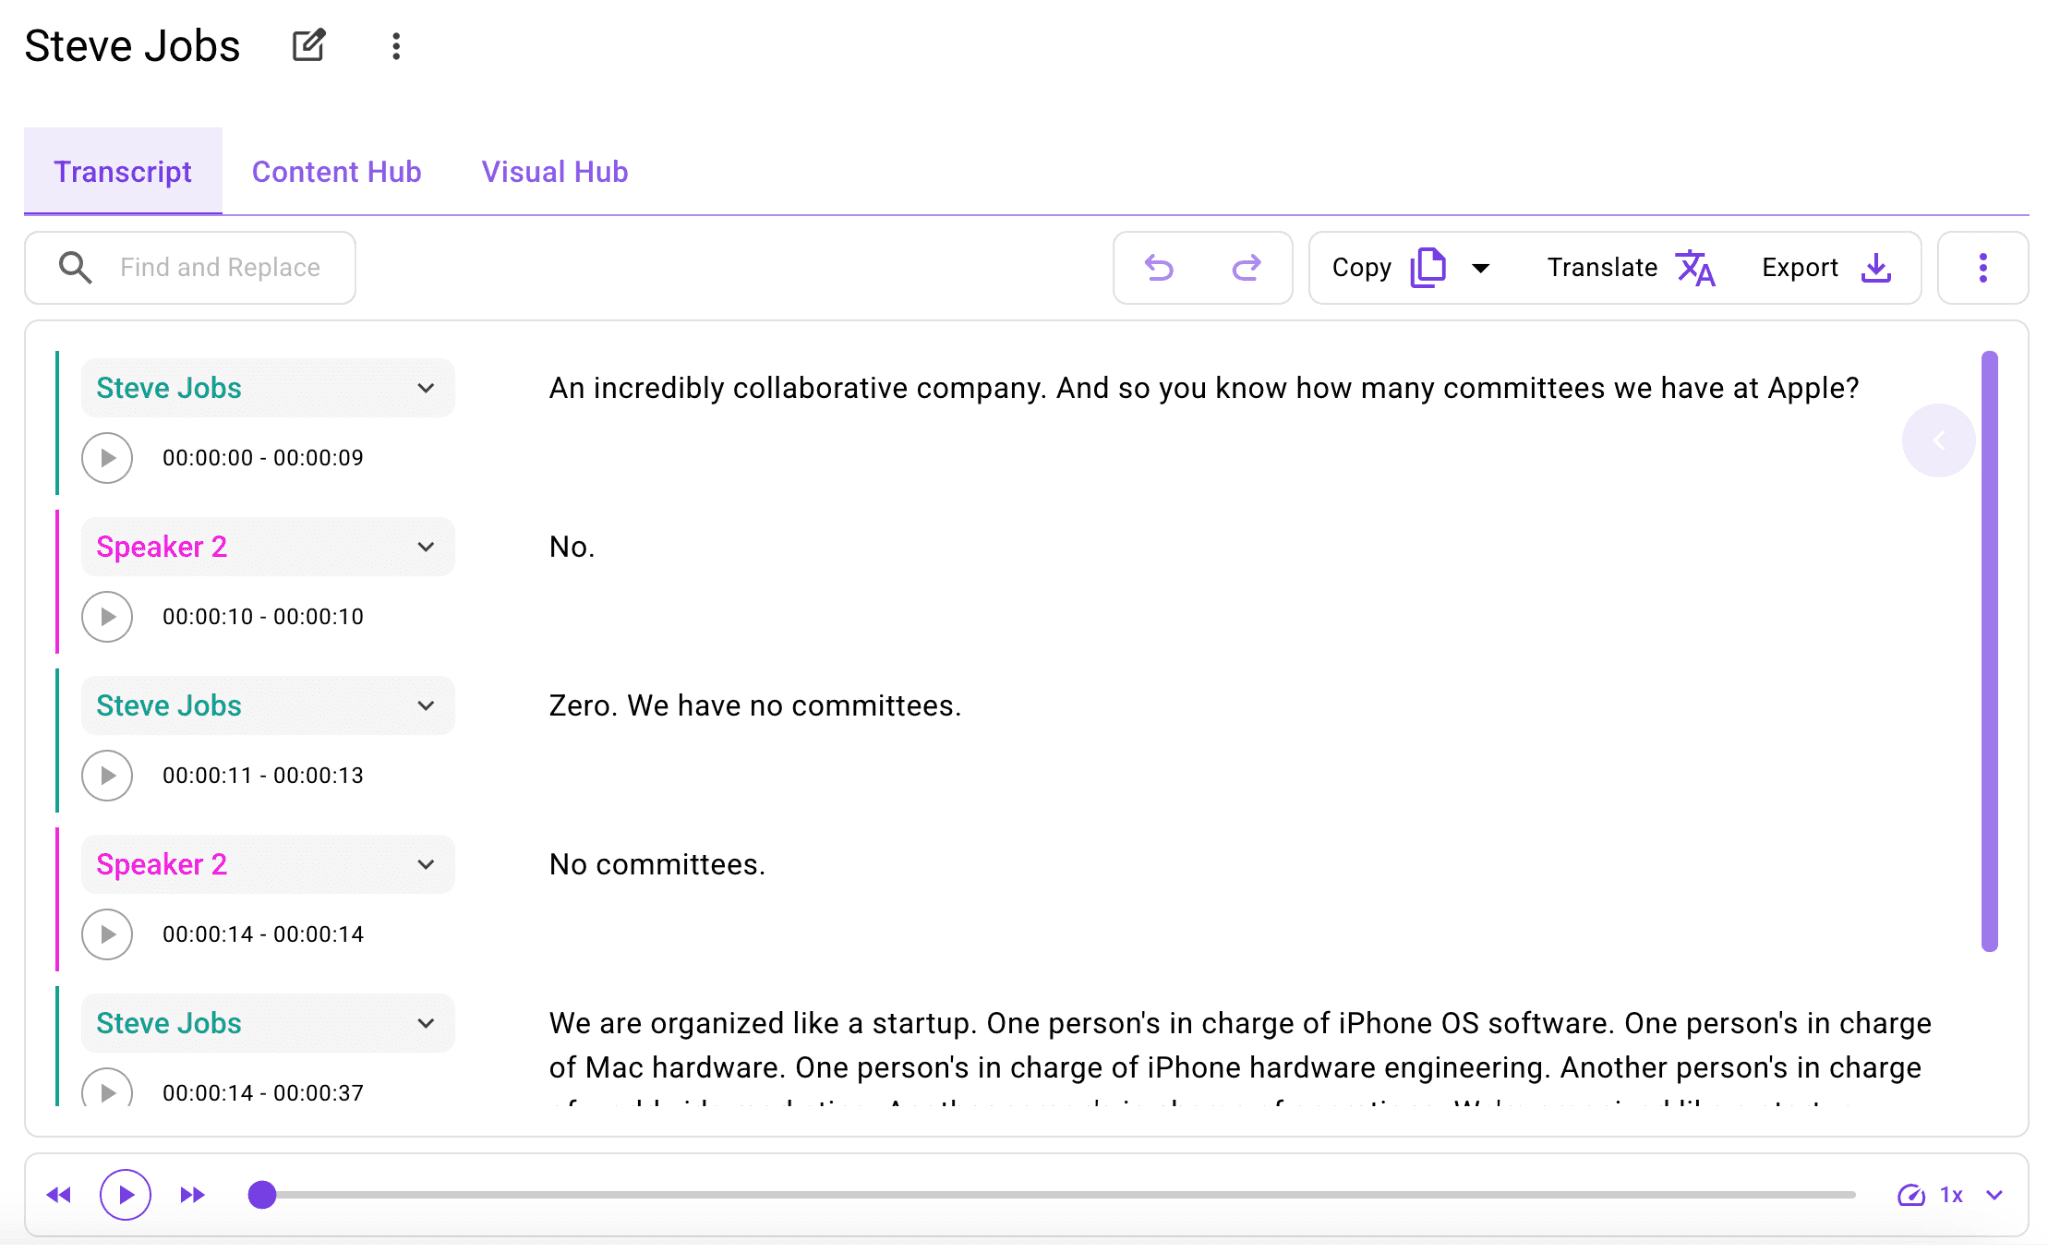
When the transcript is ready, it opens in WhisperTranscribe’s built-in editor. The transcript is displayed alongside the audio for easy comparison. You can click on words in the transcript to jump to specific points in the recording for review or editing.
If you enable speaker recognition, you will see labels like "Speaker 1" and "Speaker 2" throughout the transcript. You can rename these to the actual speaker names before exporting to improve clarity and readability.
Use Magic Chat to ask questions about the transcript and extract specific details. For example, you can type “What were the three main points discussed?” or “Summarize the section on pricing,” and the system returns relevant answers from the transcript.
7. Repurpose & Export
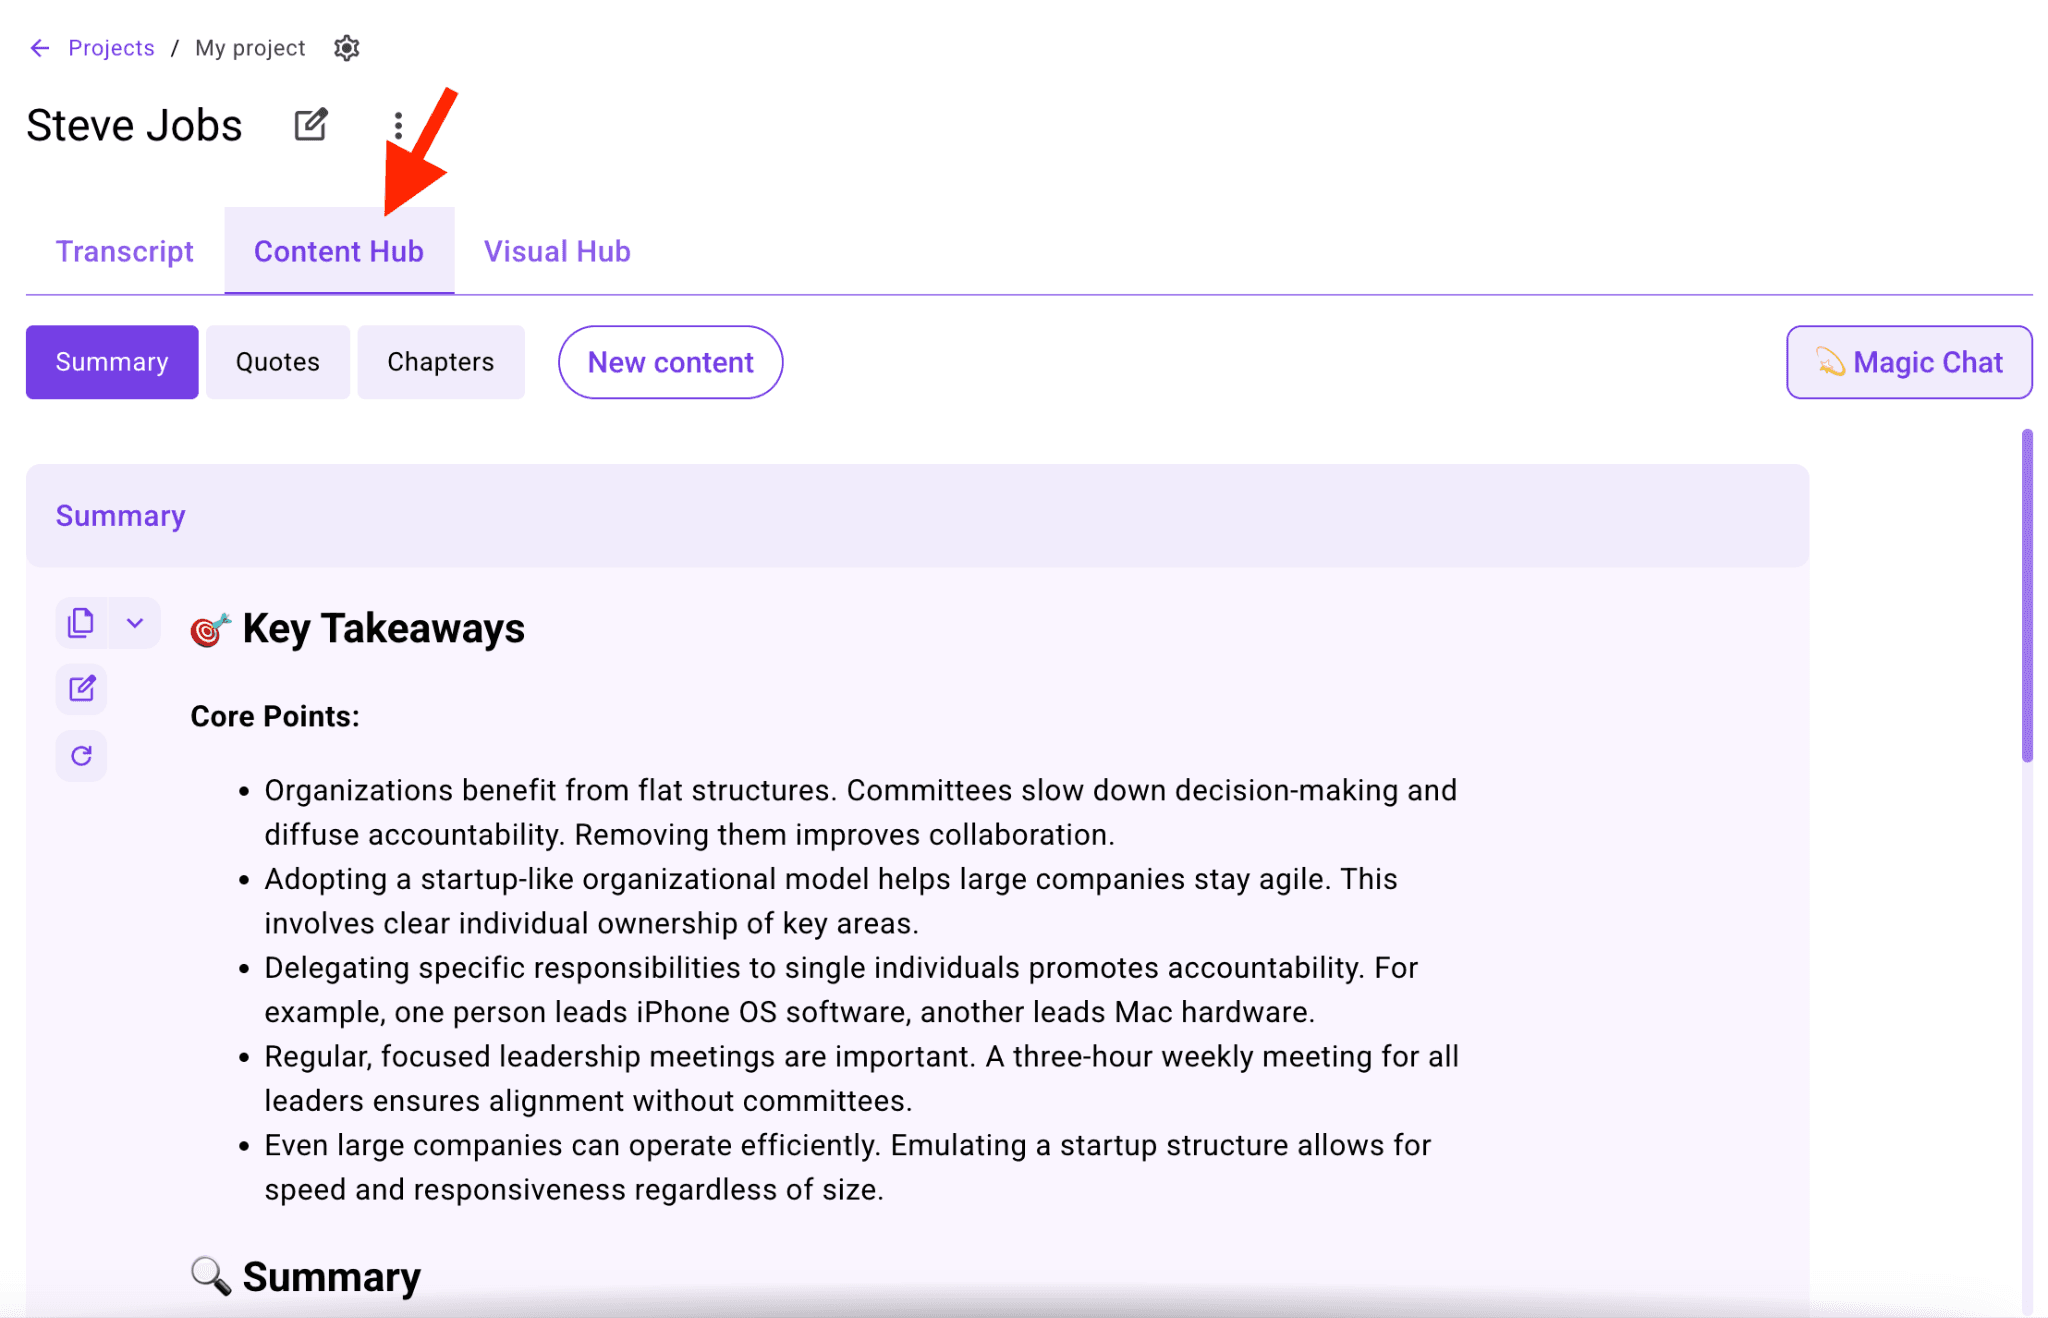
This is where WhisperTranscribe builds on raw Whisper capabilities. Switch to the Content Hub tab and turn your transcript into any of 57+ content asset types, including blog posts, social media captions, newsletters, show notes, executive summaries, sales outreach emails, LinkedIn posts, and more.
If you have recorded a 45-minute interview, the Content Hub can turn that single recording into a blog post draft, a Twitter thread, a LinkedIn summary, multiple social captions, and an email newsletter based on the same transcript.
When the text is ready, export it in whichever format fits your workflow. With WhisperTranscribe, you can export in DOCX, TXT, SRT, or VTT. You can also translate your transcript if needed. WhisperTranscribe lets you do that in 99+ languages.
Whisper vs Traditional Transcription Tools
Traditional transcription tools often struggle with real-world audio. Accents, background noise, fast speech, overlapping speakers, and casual conversations can reduce accuracy, especially when the system was trained mostly on cleaner audio.
Whisper performs better in these conditions because it was trained on a large, diverse set of multilingual audio. That makes it a stronger option for podcasts, interviews, meetings, lectures, voice notes, and other everyday recordings.
Here’s where Whisper has the edge:
Accents: Better at handling varied pronunciation and speech patterns
Languages: Strong multilingual transcription and translation support
Noisy audio: More reliable with background noise and imperfect recordings
Natural speech: Handles pauses, filler words, fast speech, and conversational flow well
Context: Better at interpreting unclear phrases using broader language patterns
Control: Open-source access gives technical users more flexibility than many closed tools
The trade-off is that Whisper is a speech-to-text model, not a complete transcription app. Used directly, it does not include an upload interface, editor, speaker recognition workflow, file library, content tools, or export options.
That is where WhisperTranscribe fills the gap. You get Whisper’s transcription quality without setting up Python, using the command line, or managing technical workflows. After transcription, you can edit the transcript, identify speakers, translate the text, export it in different formats, ask Magic Chat for key details, and use the Content Hub to turn one transcript into reusable content assets.
How WhisperTranscribe Fits Into Audio to Content Workflows
WhisperTranscribe keeps transcription and content creation in the same workflow, so you don’t need to switch between tools after generating a transcript.
After transcription, you can refine the text, extract key sections, and prepare outputs like summaries, captions, or structured notes directly from the same interface.
A single transcript can support multiple outputs depending on the use case. The same recording can be reused for written summaries, subtitle files, social posts, or documentation without reprocessing the audio.
This is especially useful for teams and creators working with recurring audio content. It keeps each recording connected to its outputs and reduces the need for separate tools for editing, formatting, and distribution.
Best Practices for Transcribing Audio Files Using WhisperTranscribe
1. Choose the Right Language Setting
Auto-detect works well for common languages like English, Spanish, or French. However, with regional dialects, mixed-language speech, or recordings where the first few seconds contain noise or silence, auto-detect can sometimes select the wrong language and reduce accuracy.
Selecting the correct language before transcription helps improve consistency, especially for dialect-heavy audio or recordings with unclear openings.
2. Enable Speaker Recognition for Any Multi-Person Recording
Even if you only have two speakers, enabling speaker recognition before processing makes the transcript easier to read afterward. It helps separate dialogue clearly in interviews, meetings, panels, and podcast episodes. Always enable this setting for multi-person recordings so you do not have to manually label speakers later.
3. Use the Highest Quality Audio Version You Have
Whisper is robust, but audio quality still matters. If you have access to both a compressed MP3 and an uncompressed WAV of the same recording, use the WAV. Better input consistently produces better output. This is especially important for recordings with background noise or unclear speech.
4. Edit Before You Repurpose
It's tempting to go straight from transcript to content generation, but an accurate transcript will produce significantly better content. This prevents you from fixing errors in your blog drafts or social captions later. Clean transcripts also ensure summaries, captions, and repurposed content reflect what was actually said in the recording.
5. Use Consistent Naming for Your Transcripts
If you transcribe regularly, have a naming convention from the start. Something like "Show Name - EP047 - Guest Name - Month Year" keeps your transcript library organized and searchable as it grows. WhisperTranscribe stores all your transcripts in a searchable library, so you can always access them whenever you want.
6. Use Batch Uploads for Series and Campaigns
If you have multiple related audio files to transcribe, upload them together using WhisperTranscribe’s batch processing option instead of one at a time. You can queue up to 10 files per batch. This helps keep related transcripts processed and organized together.
7. Export in Multiple Formats When You Have Multiple Use Cases
If your workflow requires more than one format, you can export the same transcript in multiple ways. For example, a podcast episode transcript might be exported as a Word document for a blog draft, an SRT file for YouTube captions, and a TXT file for show notes. WhisperTranscribe lets you export the same transcript in multiple formats without reprocessing.
Get Faster Transcripts and Reusable Content with WhisperTranscribe
Whisper is one of the most capable speech recognition models available. However, using it directly through the command line requires technical setup that most users do not need. WhisperTranscribe provides a simpler interface built on the same model, so you get Whisper’s accuracy without setup or configuration.
WhisperTranscribe lets you upload an audio file, configure your settings, and generate an editable transcript for review. From there, you can translate it into 99+ languages, export it in formats like DOCX, TXT, SRT, or VTT, or repurpose it into content assets using the Content Hub.
Try WhisperTranscribe for free today and turn a single audio file into a clean transcript, subtitles, summaries, and reusable content assets.

